Introduction
This tutorial is intended to help users run the eAIRS RCP application. This guide will use the sample data and eAIRS CFD workflow analysis to introduce the user to the most common features of the software. Since the software is still in early development stages, we are only distributing zip files containing the required files. Before distributing release clients, binary installation files will be created to guide the user through installing the application and providing shortcuts for launching the software.
System Requirements
The eAIRS RCP application can be ran on any platform that is supported by Eclipse, which is all major platforms. The RCP application simply has to be built for the platform that the user intends to run on. The initial builds being offered are Windows and Linux (32 bit and 64 bit). The UI simply initiates jobs so the system requirements are minimal. The next section will talk in more detail about the system requirements for the RMI service that manages the execution of jobs. The RMI service has more system requirements, some of which can be eliminated in future releases.
Running PTPFlow RMI Service
- The RMI Service is currently limited to Unix-based operating systems until the shell scripts can be converted to the equivalent windows batch files.
- The RmiContact URI must be a valid Hostname or IP Address. This is required so that the machine executing the workflow can contact the RMI Service with status updates.
- The RMI Service needs ports 51001 through 52000 open on the machine the service is running on.
- The RMI Service needs ports 50000 through 51000 open for grid ftp.
Launching Jobs
Currently, we are assuming that the jobs will run on abe.ncsa.uiuc.edu so the user will need an account on Abe in order to use the current version of the software. Abe has the proper elf installation and is setup for launching jobs with our software. In the future, this requirement will be removed when we create the setup on other machines.
Installing eAIRS
Another requirement is that the eAIRS CFD executable should be installed on Abe in your home directory. The current version of the workflow assumes that you will have the executable 2D_Comp-2.0 installed as follows, assuming the user's name is foo:
 u
u
- ac
- foo
- 2D_Comp-2.0
 2D_Comp-2.0
If you unzip 2D_Comp-2.0.tar.gz inside your home directory, you should get a directory structure similar to the one above. In the next version of eAIRS Desktop Client, we will allow the user to specify where the executable is on the launch machine.
Installing and Launching eAIRS Desktop Client
Download and unzip the installation file for your operating system. For example, linux.gtk.x86.tar.gz is for a Linux, x86 machine running GTK. This is all that is required to install the application. To launch the application, do the following:
- First, go into the linux.gtk.x86 folder (or win32.win32.x86 folder if you are using Windows)
- Next, go into the eclipse folder. You should see an executable call eAIRS, double click on it to launch the RCP application.
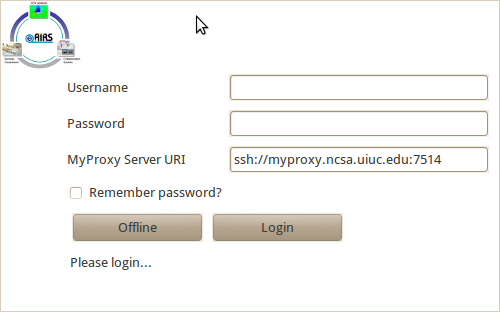
- After a few moments, you should see a splash screen display that is requesting you to log in. You can choose to work offline or you can specify your MyProxy username, password and the MyProxy Server URI to log into. See the image below:
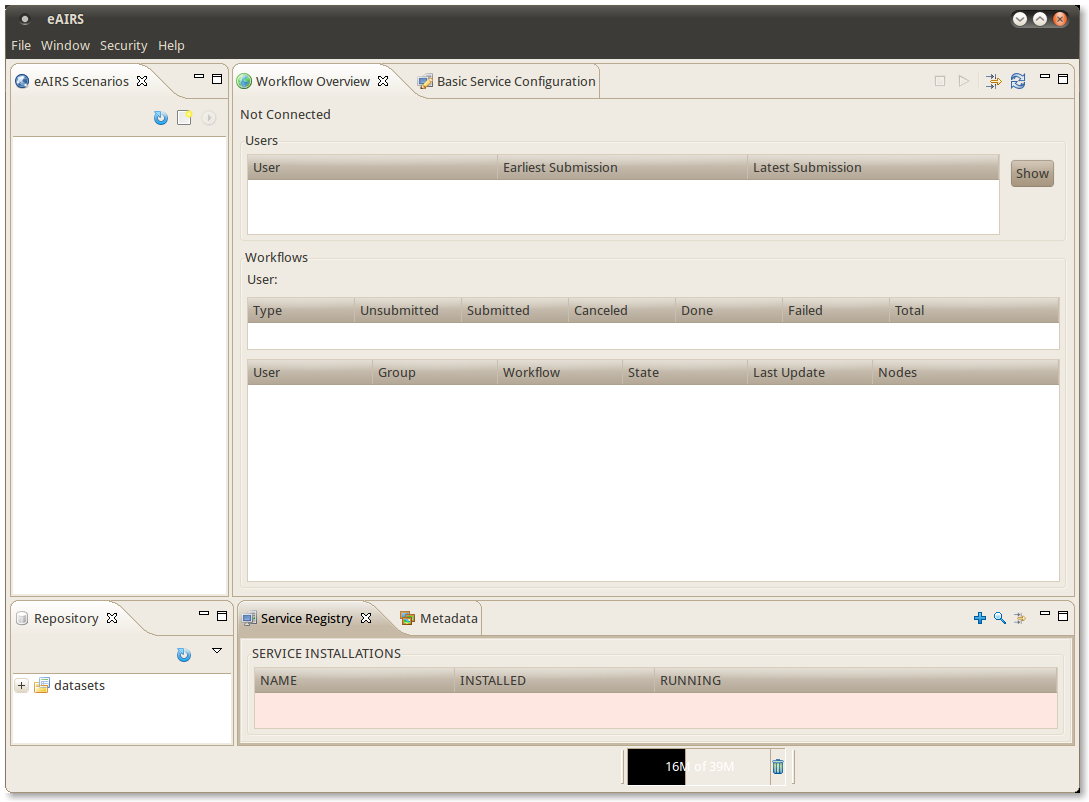
You can also check the box to save your password for next time if you are choosing to log in. After making your selection, you should see the main application screen similar to the one below.
Application Views
This section will provide a brief explanation of each view seen when the application first starts.
Scenarios View
The Scenarios view allows users to create new scenarios, add data to the scenario and execute workflows on the data contained in the scenario. To create a new scenario, do the following:
- Go to File -> New Scenario
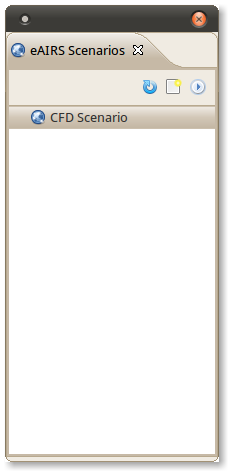
- Specify a name for the new scenario, e.g. CFD Scenario, and click Finish. Your Scenarios view should now contain a scenario with the name CFD Scenario similar to the image below:
Well see more of this view later as we add data from the repository and execute a workflow.
Service Configuration View
The Service Configuration view allows users to configure the various properties for the services they will be using. There are a few properties here that we will need to manipulate. First, we need to update the User Config Files under the Service User Configuration panel.
- Double click on user.auth.properties to open that file in an editor. You will need to add your username to this file. For example, if your username is foo, add:
foo=ADMIN
- Save the file either by closing it or ctrl+s
- Next, double click on the grid-mapfile. You will need to add the DN's (domain names) to this file. For example:
"/C=US/O=National Center for Supercomputing Applications/CN=FirstName LastName" foo
"/C=US/O=National Center for Supercomputing Applications/OU=People/CN=FirstName LastName" foo
The first entry is used if the user with username "foo" logs in to the NCSA MyProxy using their Kerberos password; otherwise, the NCSA CA would be applicable (the one with OU=people). FirstName would be replaced with foo's real first name and LastName would be replaced with foo's last name. After making the changes, save the file by closing it or ctrl+s.
- Next, we need to edit the KNOWN HOSTS. We are assuming that the workflow will be launched on the machine called Abe; however, the edits for Abe are applicable to other hosts. Double click on abe under KNOWN HOSTS. You should see the HOST CONFIGURATION panel populate with Abe's properties.
- Click on the + next to host and scroll down until you see user. For each user that is defined on the host, there will be an entry. If you don't see your information there, right click on host and select Add User
- Enter your username. After doing that, scroll down and find the user you created, right click on that user and select Set User Home
- Enter your userhome on the machine, e.g. /u/ac/foo. Right click again on the user and select Set User Name On Host
- Enter your username for the host.
For now, we are assuming that this workflow will run on NCSA Abe so the rest of the default parameters should be ok. In the future, there will be a tutorial on how to edit more of this view when trying to add new machines.
Workflow Overview View
This view is where you can access information about your running workflows by connecting to the RMI Service endpoints. We haven't defined any RMI Services (see Service Registry View) so we cannot connect to an RMI service. Once we have defined a service, you can connect to it by clicking on the
 icon and selecting your RMI service. We'll go through this later after we have defined an RMI Service.
Repository View
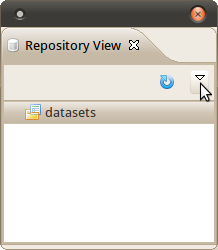
The repository view shows all imported datasets that can be used in workflows that are available with the software (more on that in the developer documentation). Two sample datasets have been included for the eAIRS CFD Workflow and can be automatically imported by clicking on the triangle in the Repsitory view and selecting Install Sample Data. In the image below, the view menu (triangle) is being pointed at by the mouse curser.
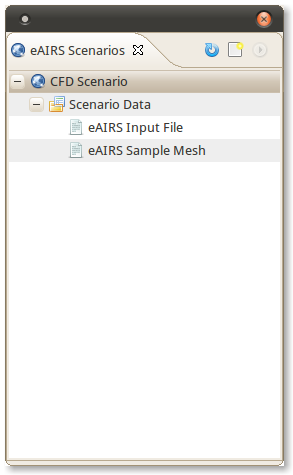
After clicking on Install Sample Data, the sample data will be installed in a few moments. Once it finishes, click on the + symbol next to dataset to see the two installed datasets. To add a dataset to the scenario we created, click on the dataset in the repository view and drag it to your scenario. Do this for both datasets that we installed and your scenarios view should look similar to the image below:
Service Registry View
In the Service Registry view, users can define the RMI services that will be used to launch jobs on the supercomputers. The current RMI service is limited to unix-based operating systems so the RMI service must be launched on a Linux machine, Mac or other Unix-based computer. For this tutorial, we will assume that the machine running the RCP application is unix based and can run the RMI service. To add a service, click the  icon in the view.
- Where it says Name, in the dropdown menu select the name of your machine (it should be automatically populated with valid entries, including your machine). After selecting your machine, all of the entries should be populated with valid entries. If you want, you can edit the InstallPath to be a different location, the default is user_home/ptpflow, e.g. /home/foo/ptpflow. You should have a dialog box similar to the one in the image below, except the your entries will be for your particular machine.
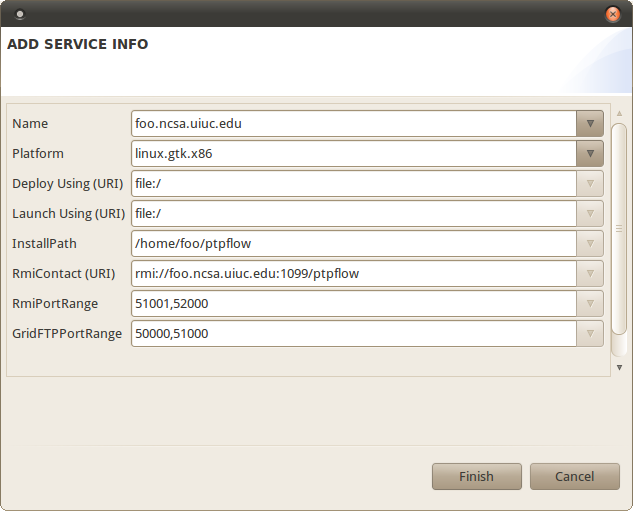
- After editing the entries you want to change, click Finish. You should see the service added to the Service Registry view. Next, select the service in the view and right click on it. From the popup menu, select Install At Location. This will take a few moments to install the RMI service plugins.
- Next, right click on the service again and select Launch Service. After a few moments, the service should start and you should see the informational dialog that says the "Service is now up".
Execute CFD Workflow
Now that we have an RMI service, it's time to connect to it so we can launch our eAIRS CFD workflow.
Connect to RMI Service
- Go back to the Workflow Overview view and click on the icon. Where it says RmiContact(URI), select the service you created (e.g. rmi://foo.ncsa.uiuc.edu:1099/ptpflow). See the image below:

- Click Finish to connect to the service.
Execute Analysis
- To execute our analysis, select the scenario we created and then click on the
 icon. You should see a dialog similar to the one below:
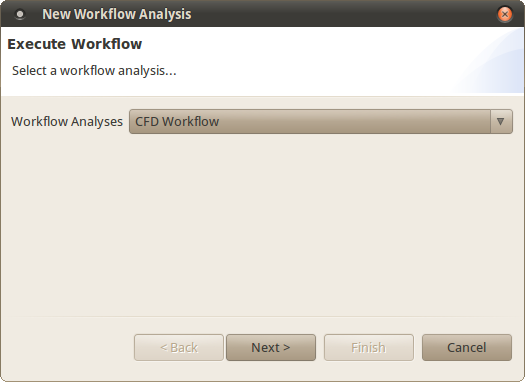
- From the dropdown menu next to Workflow Analyses select CFD Workflow and click Next.
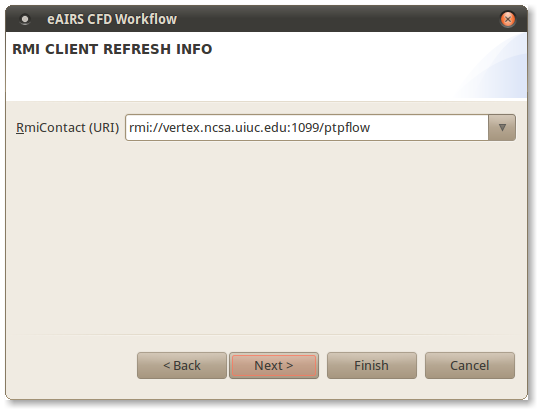
- If you haven't already specified an RMI service, you will see a screen similar to the one below. Select the service to connect to and click Next.
- You should see an input screen for the CFD workflow similar to the one below.
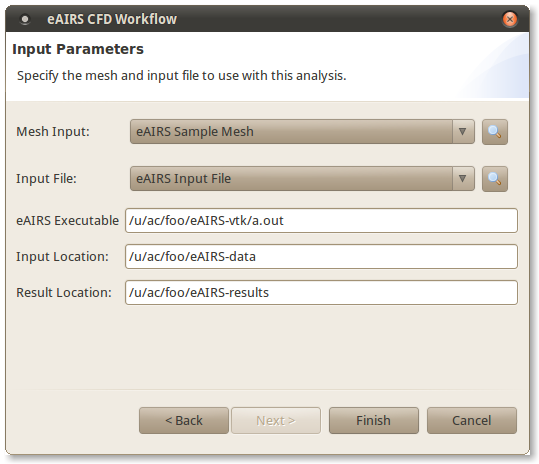
- For Mesh Input, select the dataset that we added to our scenario called eAIRS Sample Mesh.
- For Input File, select the dataset that we added to our scenario called eAIRS Input File.
- For Remote URI, enter or select the gridftp URI of the launch machine. For example, Abe's gridftp URI is: gsiftp://gridftp-abe.ncsa.teragrid.org:2811/
- For Remote Location, select the location on the remote machine (Abe) to send the data for execution. For example, if you specify /u/ac/foo/eAIRS-data, we will create a directory called eAIRS-data inside your home directory /u/ac/foo to store the data. After specifying the input values, click Finish to execute the workflow.
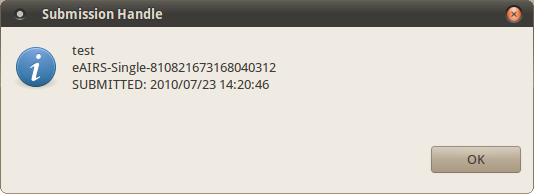
- Once the workflow is submitted, you will see a confirmation similar to the one below:
Workflow Monitoring
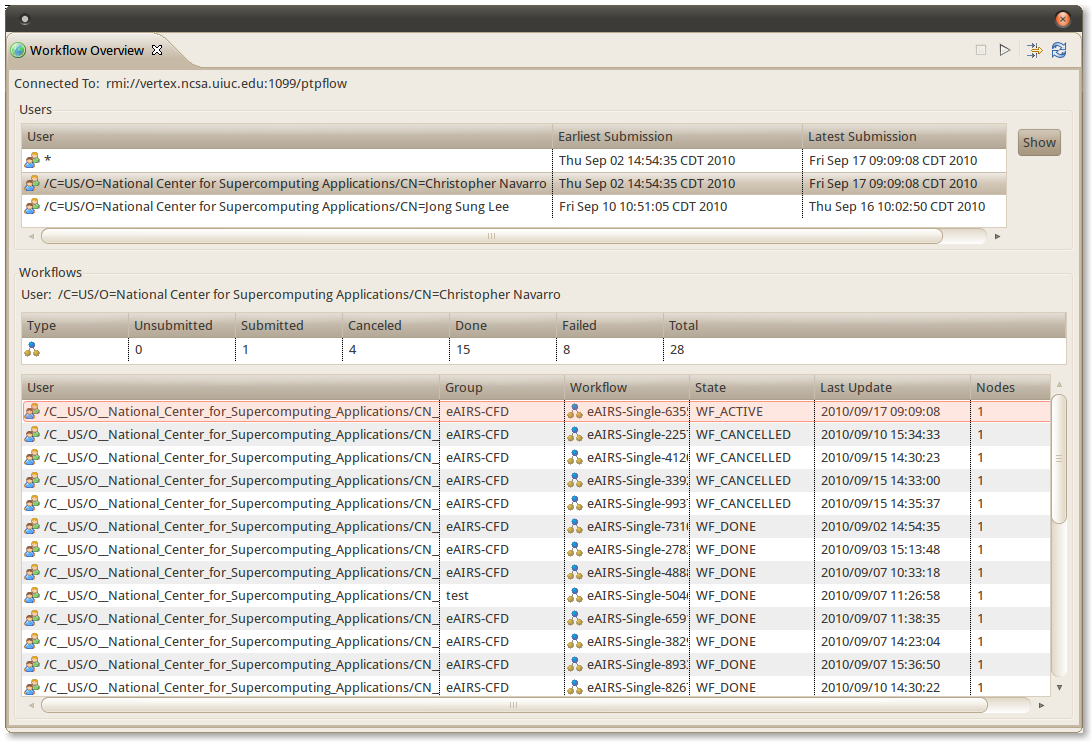
If you click the Refresh  icon in the Workflow Overview view, you should see a view similar to the one below:
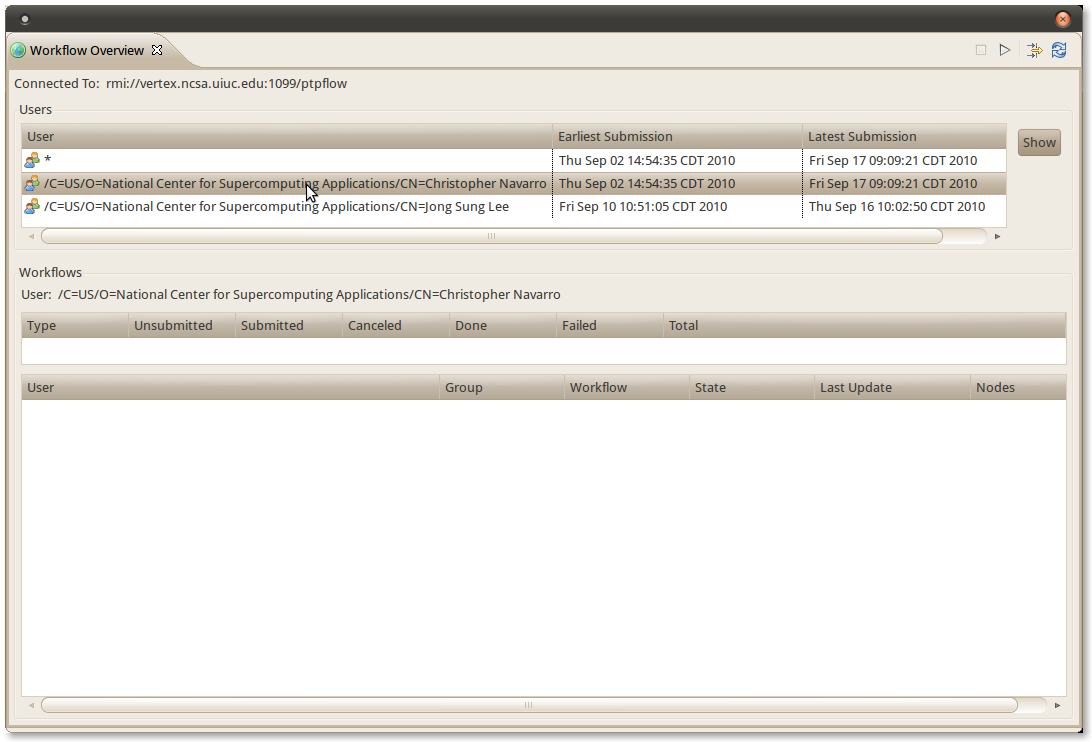
If you double click on your username (see the mouse cursor in the above view), you should receive some information about the workflow similar to the image below:
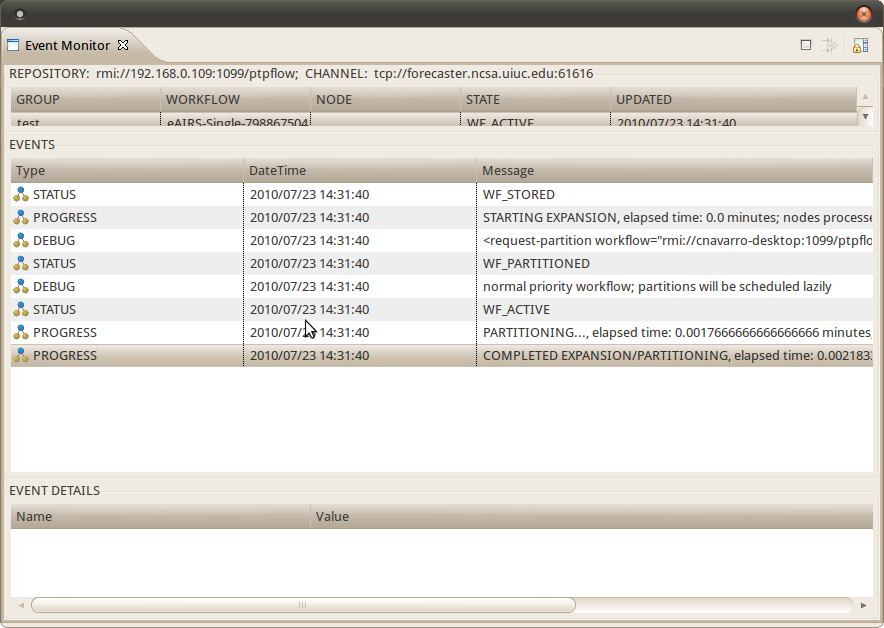
If you right click on your workflow (see the mouse cursor position in the above image), you should have some options such as Graph Details, Monitor Workflow Events, etc. If you click on Monitor Workflow Events, a new view called Event Monitor should open. Click on the Connect icon and Click Finish to accept the default options. You should see some events similar to the ones below:
The PTPFlow views offer many options for obtaining various details about your workflow and more of these will be detailed later in other tutorials and in some short videos that will provide more information about how to access the various features of PTPFlow.