This guide explains how to create a virtual machine (VM) using Radiant's OpenStack Dashboard (Horizon). There is also a description of how to access your new VM and how to mount persistent storage volumes.
Quick highlights:
- If your VM uses a volume (default) it will count against your flash quota
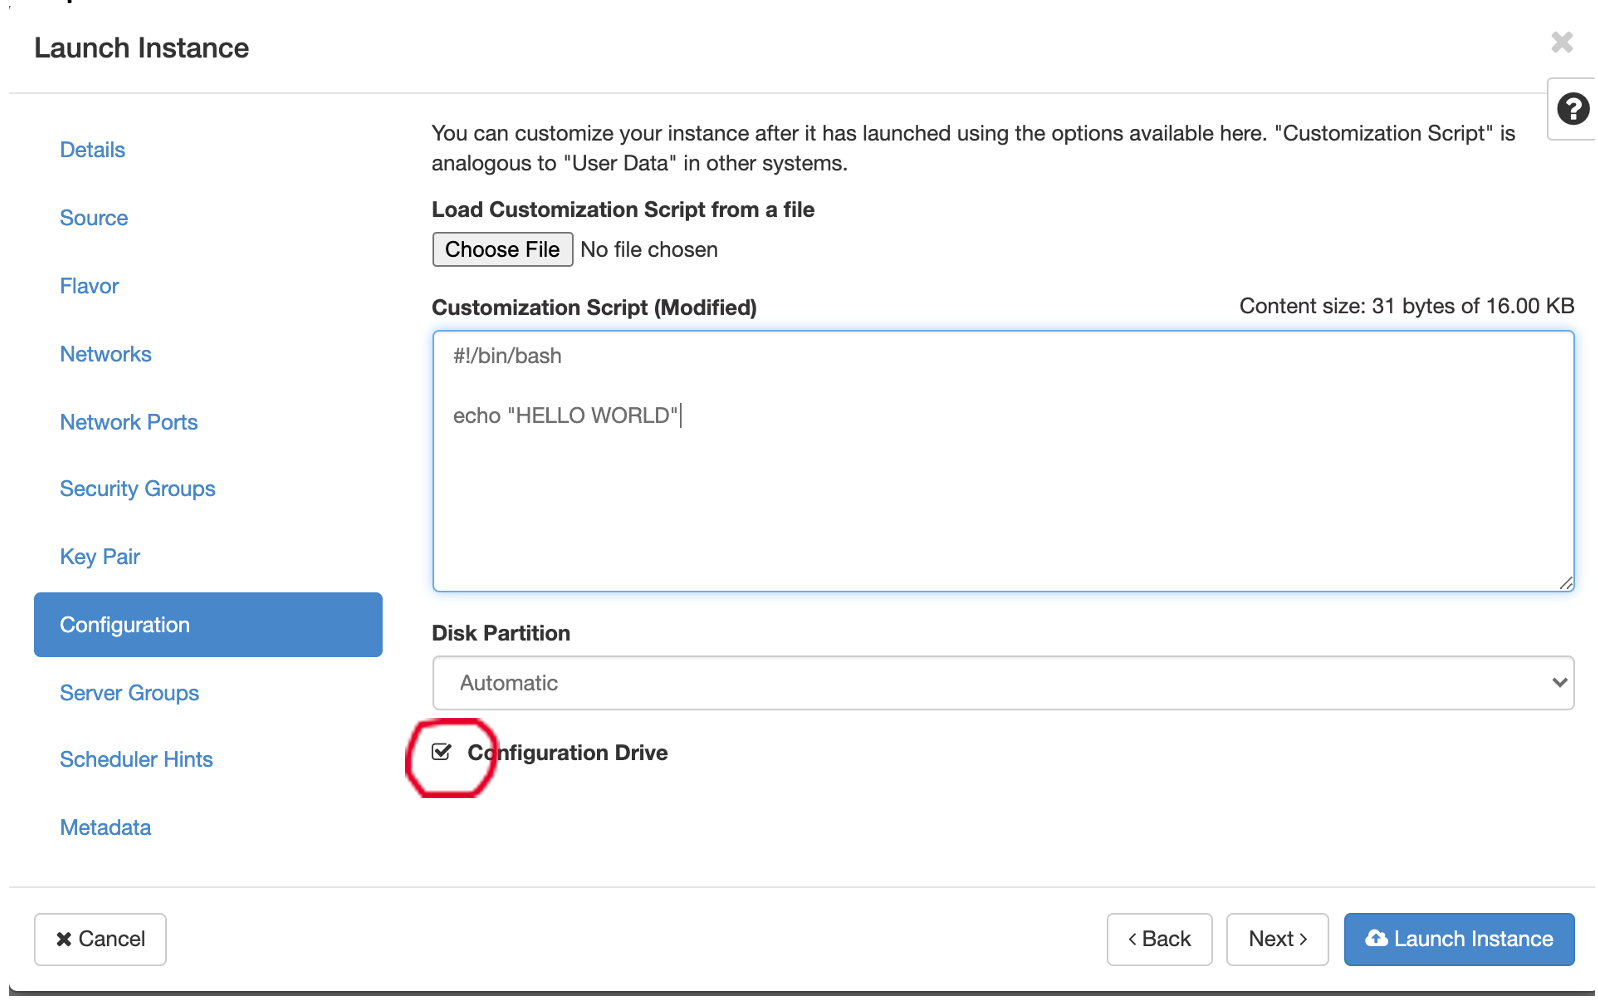
- You need to select Configuration Drive in the configuration tab
Table of contents
VM Creation
Defaults
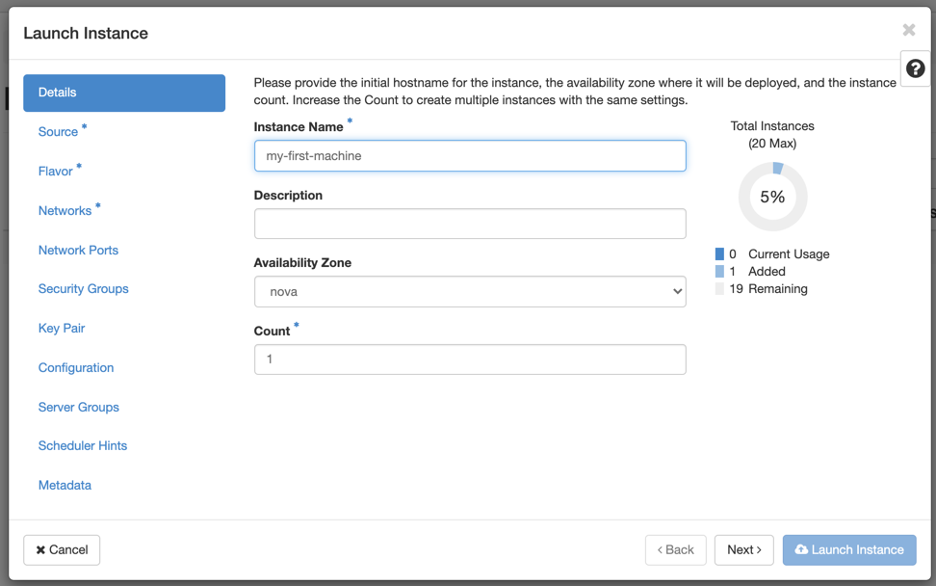
Name your instance
Source
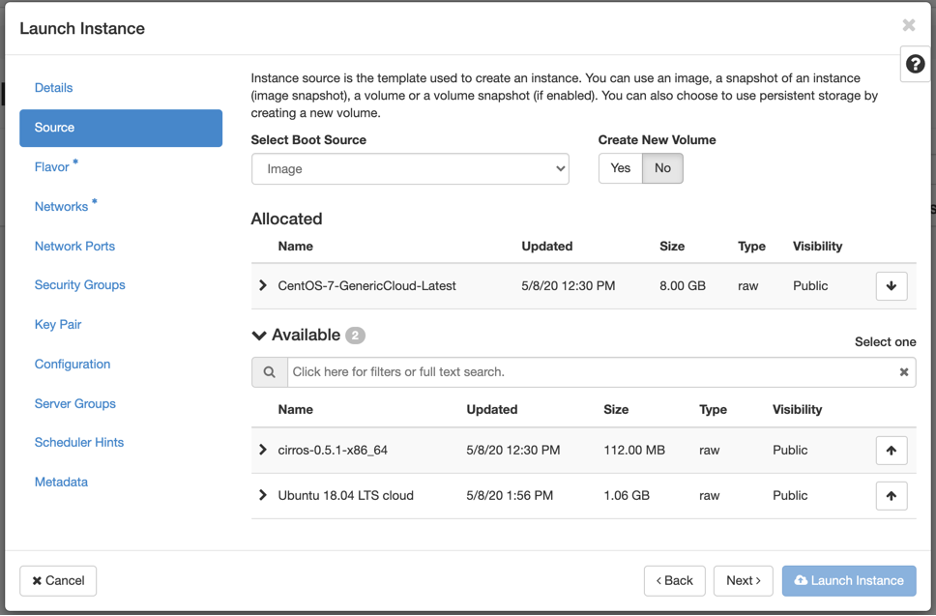
Select base OS and where to run. The default is to create a new volume. This will count against your flash storage quota as well as take up one of your volumes. This is good if you want your data to persist after you tell openstack to delete your instance. If you want to create an instance that can be rebooted (maybe migrated), you can select “No” for this. If you create a new volume you can pick the size of the volume, if you selected no, it will use the default size for the Flavor (see point 3). You will also need to select the base image you start with. This list might change over time.
Flavor
Next you select the flavor (again this list might change over time). If you select a flavor that would use to many resources you will see a yellow exclamation sign next to it. If you selected No for the volume create in the source screen, the volume will be the same size as the root disk.

Networks
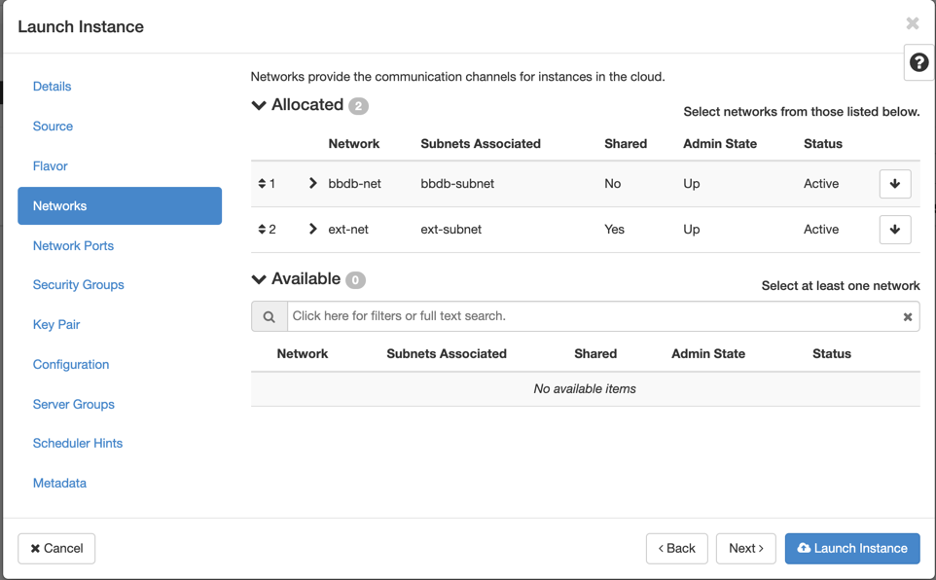
Next we select the network. You may see a few network options to choose from here. Look for a network that is <projectname>-net, for example bbdb-net, where bbdb is the name of your project. By default this network does not allow for external connections. Only other hosts on that same network will be able to reach this machine. This is fine for a host that only needs to be reachable from other hosts within your network. If you need to setup a host that is reachable from outside your network, you will need to associate a floating IP address to your instance. This is setup after an instance is created (see below).
Network Ports
Can be ignored
Security Groups
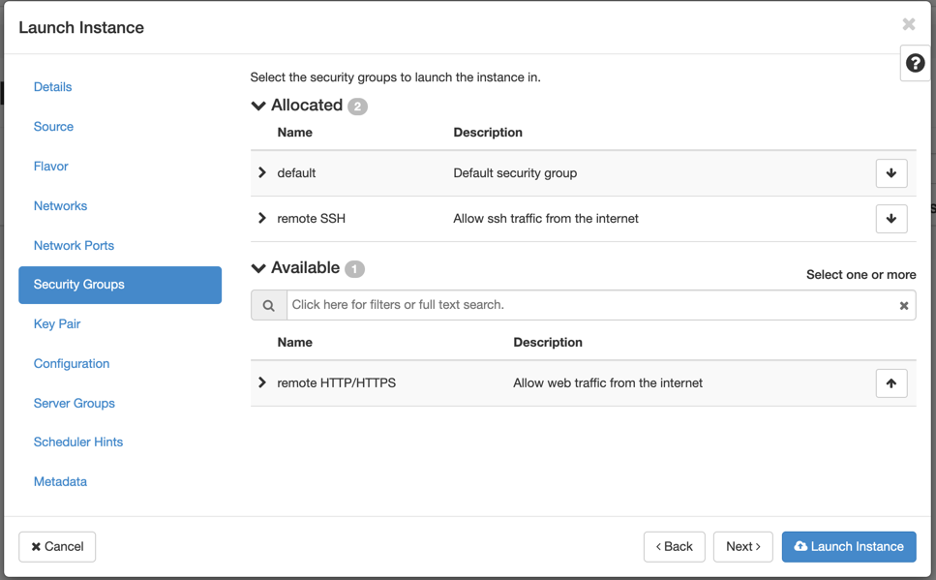
Security Groups will allow you to add additional security groups. It is good to add remote SSH to allow you to ssh to the host. If a port is not opened in the security group, you will not be able to reach that host on that port. This is basically a firewall that blocks all incoming traffic by default.
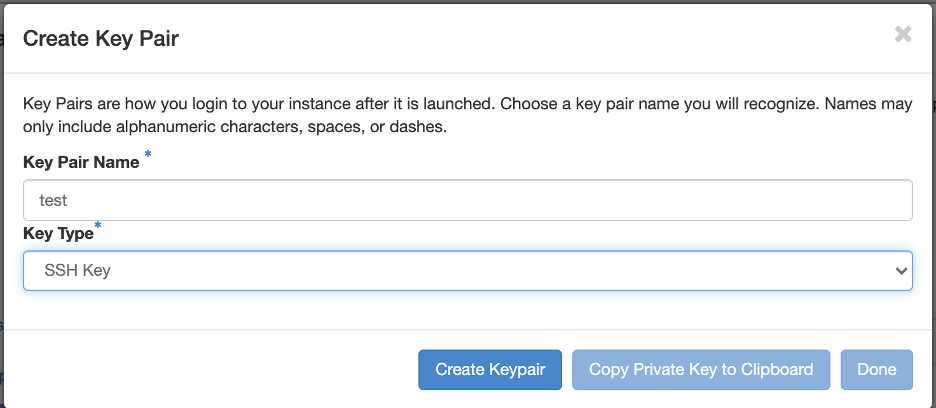
Key Pair
Next you need to either select an existing key pair or create a new one. If you do not select a key pair, you will not be able to SSH into this machine. The default behavior is for most base images to not have a user with a password. See the end for some common usernames for each image. If you create a new key, make sure to copy the private key and save it to disk.

Configuration
The next screen allows you to configure the new machine on boot. You can use this to install programs, or do anything else on first boot. YOU NEED TO SELECT CONFIGURATION DRIVE HERE. The default is for it to be unchecked. If you leave it unchecked your key, and/or startup script will not work!
Server Groups / Scheduler Hints / Metadata
You can leave these 3 sections as is. And you can now launch your instance. It should be ready in a few minutes
Accessing your instance
Once you have created your instance you can see it listed in the dashboard under Instances. Once the instance is Active and Running you should be able to SSH to it. If your instance does not need to be accessible directly from the outside, you can SSH to it from another instance that is on the same network as your new instance. You'll just need the IP address, the username, and the key (you did save it right?)
If your host does need to be reachable directly from the external internet, you need to associate a floating IP address to it. To do that, locate your instance in the list and click the down arrow button in the 'actions' column. From this menu list select 'Associate Floating IP'. From the 'IP Address' selection box, pick an available IP from the list. For 'Port to be associated' you can usually leave the default, but if you have multiple interfaces you can select the appropriate port. Then click the 'Associate' button. Afterwards you can access this host using the floating IP address you just assigned
In this case I can now ssh to my instance using: ssh -i test.pem centos@IP_ADDRESS, replace IP_ADDRESS with your local project-net IP or your floating IP address if you assigned it one. You might get an error that the permissions are too open. If that is the case you can change them using chmod 600 key.
Running in the system
First thing to do is make sure you mount in storage condo if you want to use more diskspace. Each instance only has a little storage (40GB) that is primarily used for the OS. You can mount additional storage using:
sudo mount -t nfs radiant-nfs.ncsa.illinois.edu:/radiant/projects/bbdb /mntThis will make your storage space available on your machine. It will take a few minutes from when your machine boots, until the space can be mounted.
Change your root password
Once you're able to log in remotely as root, be sure to change the root password on your instance. This allows you to access your instance's console via the web interface if you can't ssh in later for some reason.
Troubleshooting
Trouble accessing systems.
- Did you add Remote SSH as a security group? If not you can edit the security groups and add the group to the instance.
- Did you add the networks in the right order? Remember ext-net needs to come last. If you goto interfaces of the running instance, the ext-net needs to be at TOP of that list (don’t ask me why it is flipped around here). Delete the instance and recreate.
Did you use the right username? The following is a list of known usernames:
OS username CentOS centos
Ubuntu ubuntu CoreOS core
Trouble in the system
- I’m out of diskspace. Make sure to mount storage condo for all your data. You only have a small amount of root storage.