Provisioning is when new code is loaded deploys code (in a C3 package) onto a C3 Tenant and Tag. From At a high level, a C3 package is defined as a specific set of files and directories defining the Types, configuration, runtimes, and initial data for the C3 deployment. Once a package is provisioned to a C3 Tenant/Tag, users can access documentation, fetch types, evaluate metrics, and perform more advanced tasks such as training machine learning models or running batch jobs.
To provision on C3code to a C3 tenant/tag, you first need to understand what exactly a C3 Package is, and how it is structured. Generally speaking, C3 packages follow a strict specification on specific directory structure and file location. i.e. all type definitions are located somewhere (e.g. all .c3typ files are located in the src directory). C3's official documentation on this matter is quite extensive:
Please read C3's official guide and explanation of on C3 package structure here: https://developer.c3.ai/docs/7.12.0/topic/deployment
Please read C3's official guide and explanation of on Provisioning available here: https://developer.c3.ai/docs/7.12.17/topic/tools-console-provisioning
...
There are two methods to provision a C3 package. First, the static console of your tenant/tag provides
- Via a web-based provisioner
...
- in a tenant/tag's static console.
- Via C3.ai's command line interface (CLI), which enables developers to provision code without a web-browser.
Web Provisioner
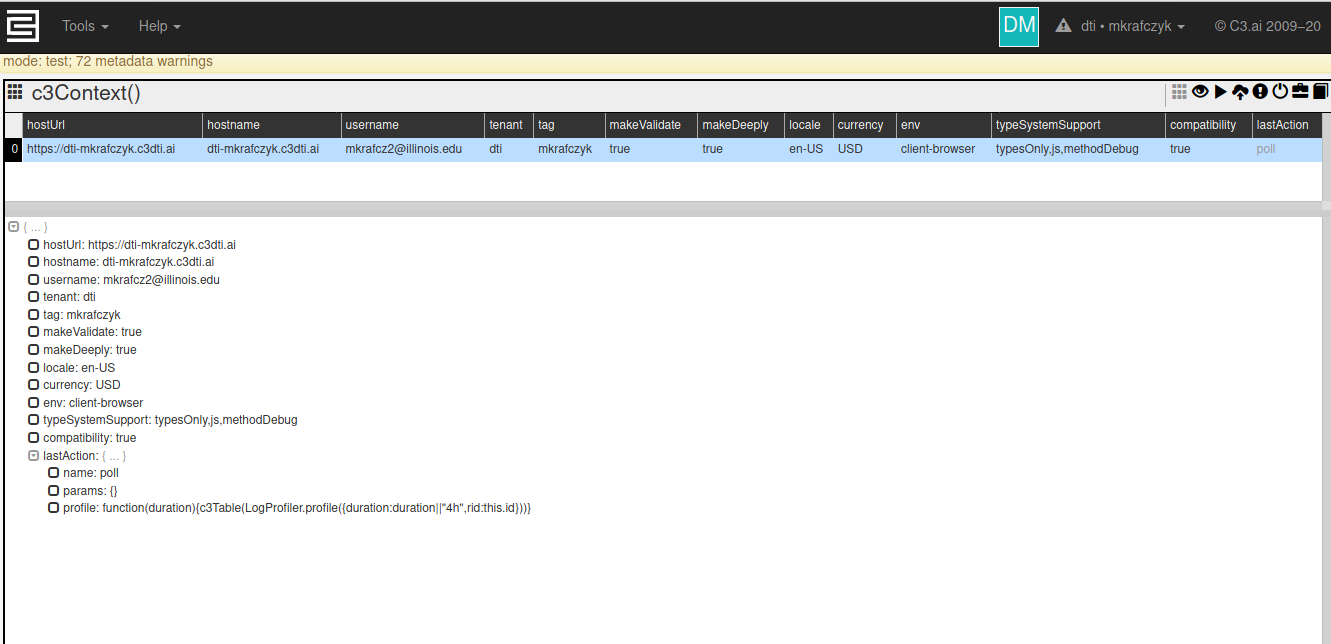
After accessing your C3 tenant/tag, you should be presented with see a page like the following:
In the upper right hand corner, we can you will see a button featuring a cloud with an upward pointing arrow. ![]() This leads to the provisioner tool Clicking on it, opens C3's web-based provisioner.
This leads to the provisioner tool Clicking on it, opens C3's web-based provisioner.
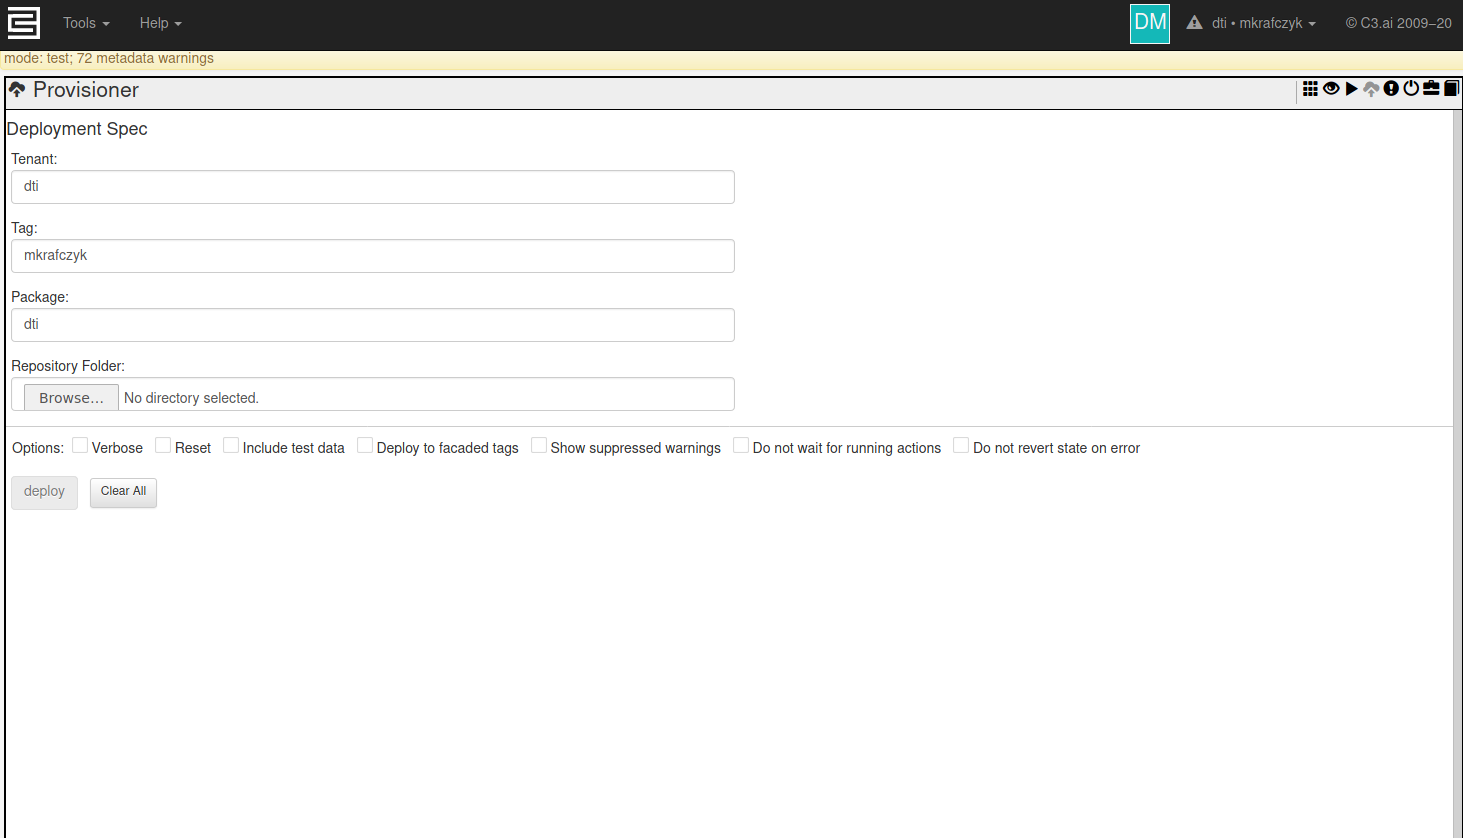
Using this tool is very simple
- Enter the name of your tenant in the textbox 'Tenant'
- Enter the name of your tag in the textbox 'Tag'
- Enter the name of your package in the textbox 'Package'
- Click the 'Browse...' button and select the top-level directory of your C3 package.
- Click the 'Deploy' button which should become active once the previous steps are completed.
- Wait! Do not refresh your browser tab! Once provisioning is complete, your tab will start responding respond again. The provisioning process Provisioning blocks the execution on that tab until provisioning is complete.
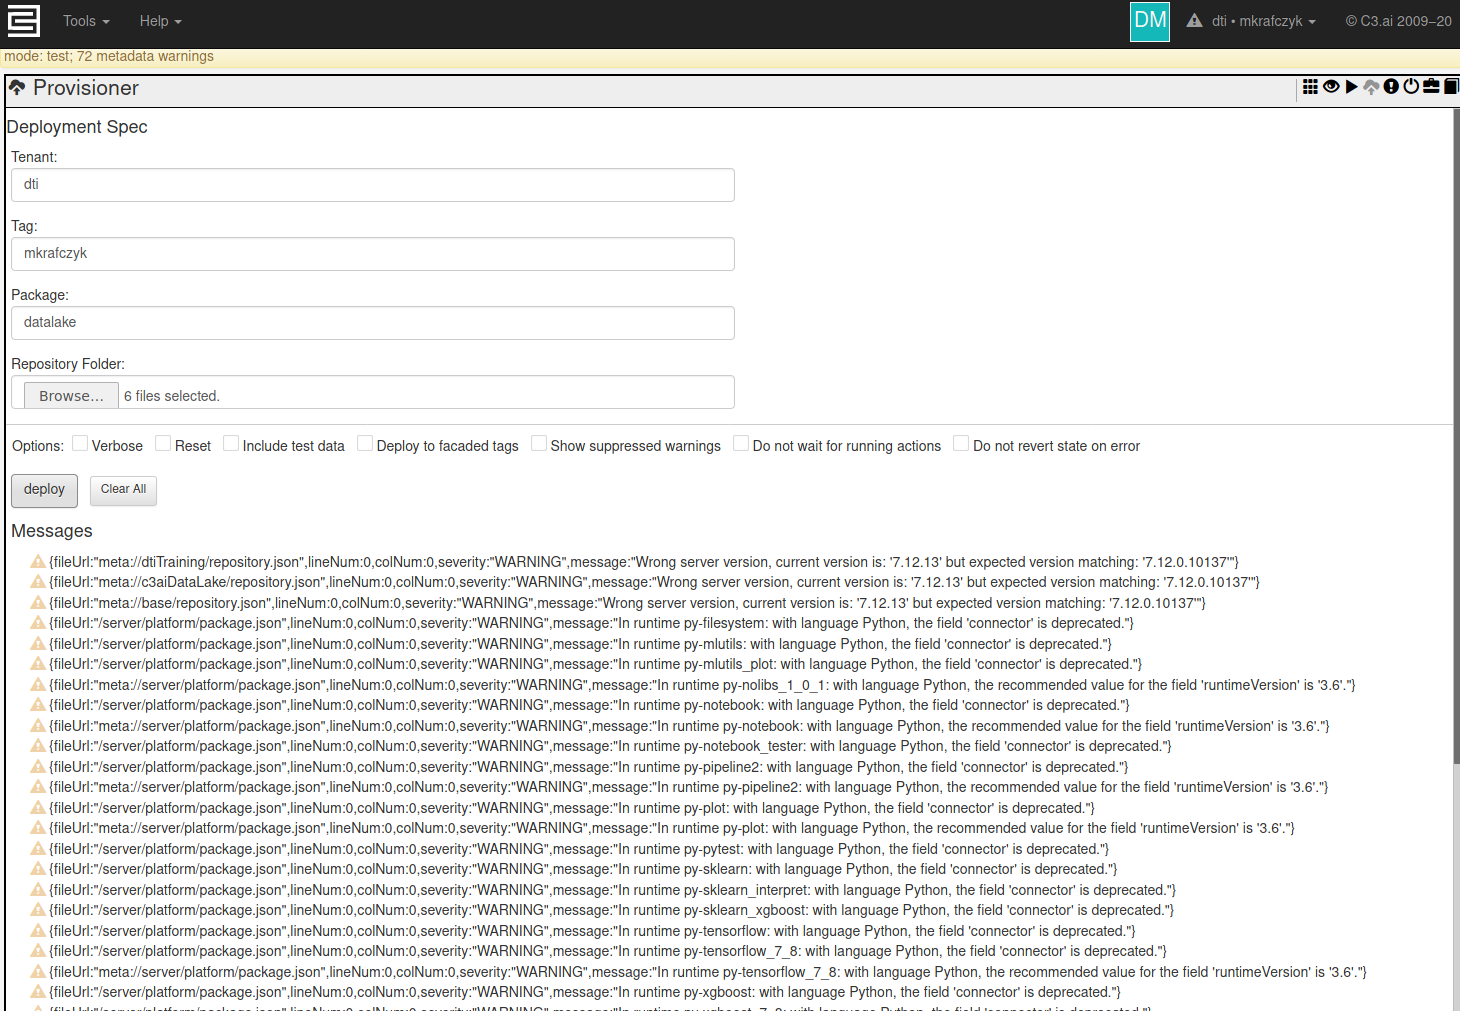
Once provisioning completes or fails, your tab should become responsive again, and there should be some messages below the 'Deploy' button. If successful, this will be a list of WARNINGS which can be safely ignored. We will mention here any warnings you need to be concerned about. If provisioning failed, there should be a list of ERROR messages which should give some clue what the problem was.
Here is an example of the provisioner page after a successful provisioning:
And here it is the provisioner after a failure:
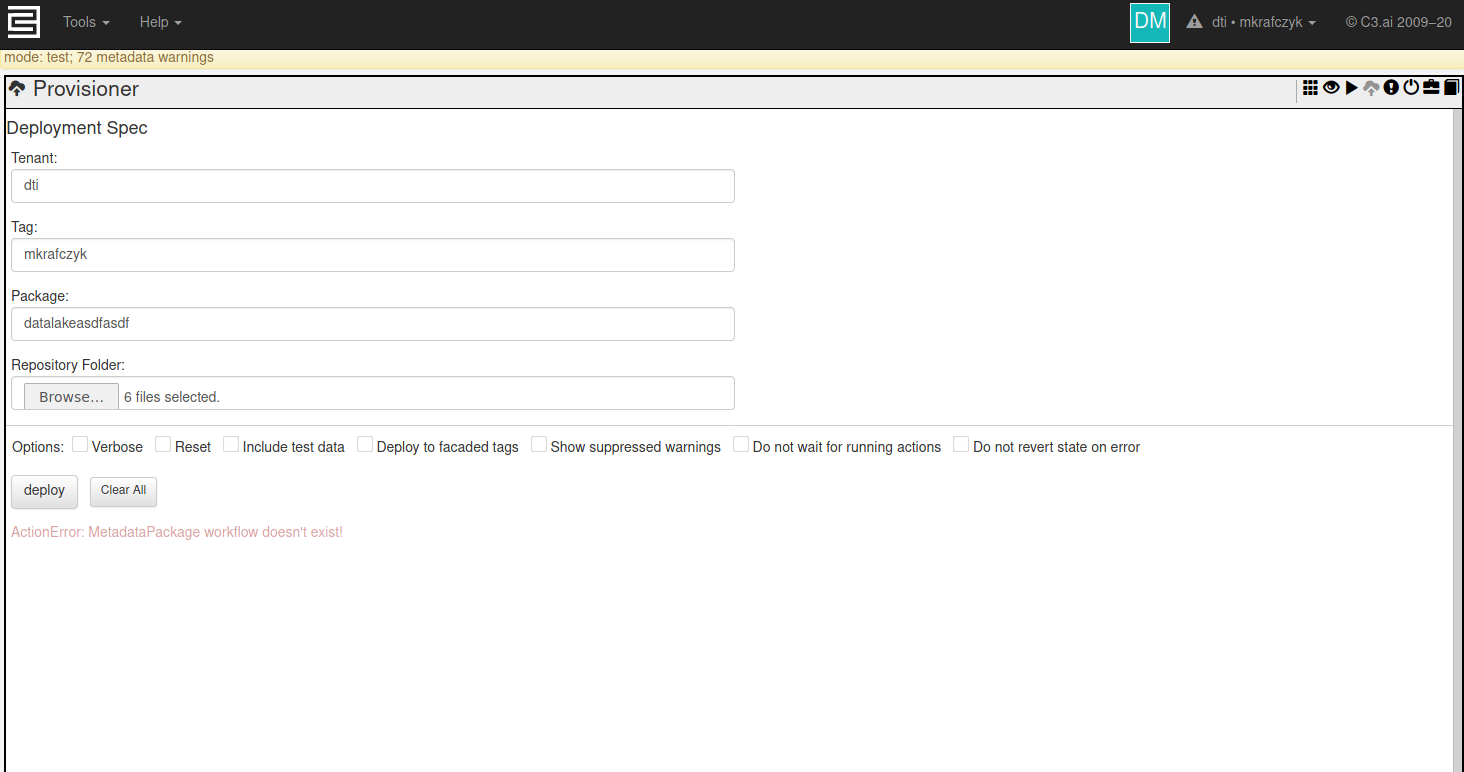
This particular error "ActionError: MetadataPackage workflow doesn't exit" error described above means that it the provisioner can't find the package 'datalakeasdfasdf' (Misspelled on purpose to demonstrate an error)
...
Installing the C3 command line tool
Use the c3 command line interface to provision code
Before executing this command, navigate to the top-level directory of your C3 package source code. You are then going to Then, run a form of the following command:
...
tenant: The name of your tenant (e.g., dti)
tag: The name of your tag (e.g., bertsimas)
package: The name of your package (the 'name' field in your 'package.json' file)
vanity_url: The vanity url of your c3 cluster (e.g., https://dti-berstimas.c3dti.ai)
auth_token: A generated authentication token; to generate an authentication token for your C3 package, execute 1 one of the following commands:
In the C3 JavaScript your tenant/tag's Javascript static console:
| Code Block | ||
|---|---|---|
| ||
Authenticator.generateC3AuthToken() |
...
| Code Block | ||
|---|---|---|
| ||
c3.Authenticator.generateC3AuthToken() |
Here's what executing the c3 prov command looks like when it completes successfully:an example of a message in the command line interface, after a successful provision.
| Code Block |
|---|
[dti/mkrafczyk] Created 2.56Kb ZIP of one package in 0.0s
[dti/mkrafczyk] Server Warnings:
{fileUrl:"meta://dtiTraining/repository.json",lineNum:0,colNum:0,severity:"WARNING",message:"Wrong server version, current version is: '7.12.13' but expected version matching: '7.12.0.10137'"}
{fileUrl:"meta://c3aiDataLake/repository.json",lineNum:0,colNum:0,severity:"WARNING",message:"Wrong server version, current version is: '7.12.13' but expected version matching: '7.12.0.10137'"}
....
....
{fileUrl:"meta://server/uiFramework/src/changeLog-uiFramework.c3doc",lineNum:3,colNum:0,severity:"WARNING",message:"Unknown documentation category 'Change Log'.",listenerType:"DocumentationTopicListener"}
{fileUrl:"meta://server/webdriverProtocol/src/changeLog-webdriverProtocol.c3doc",lineNum:3,colNum:0,severity:"WARNING",message:"Unknown documentation category 'Change Log'.",listenerType:"DocumentationTopicListener"}
[dti/mkrafczyk] Provisioning completed with some warnings (2020-08-19T17:05:13.116-05:00)
Time taken: 1m 34.145s
Finished |
...
If you're using the JavaScript static console to interact with your C3 package, refresh your browser tab, or execute the command 'c3ImportAll()' in the JavaScript static console. Once completed, you should find all variables have been , all code in your tenant/tag (e.g., types, metrics, seed data) should be updated to match your new C3 package.
If you're using Jupyter through C3's interface, you may need to restart the Jupyter interface.
If you're connected to C3 through a remove python or Jupyter session, you will need to re-run the cell which creates the `c3` object.
COVID-19
...
Data Lake Provisioning
To use deploy the COVID-19 Datalake to your tenant/tag, please clone to your machine the base COVID-19 C3 package located here: https://github.com/c3aidti/dtiTraining
Then following either of the methods above, provision the dtiTraining subdirectory using Package 'baseCovidDatalake' package from the dtiTraining subdirectory.