For scientists wanting to jump right into using C3 AI Suite through Python or R, the integrated Jupyter notebook is a great option. Once you get your C3 AI environment tenant/tag (and Vanity Url), you can easily access the integrated Jupyter Notebook by navigating to `<vanity_url>/jupyter`.
When you access the Jupyter path, C3 AI will spin up a new container containing a Jupyter instance. The first time you do this, it will take a few minutes for this provisioning to be completed behind the scenes. Once completed, you'll arrive at a Jupyter directory!
Here is some additional guidance for setting up the Python Runtime Action: DTI Guide to Python Action Runtimes in the C3 AI Suite.
There are a couple of options to interact with the Jupyter notebooks:
- Create a new notebook: Select 'New' in the upper right and create a new notebook. For now you can only create a new Python3 notebook.
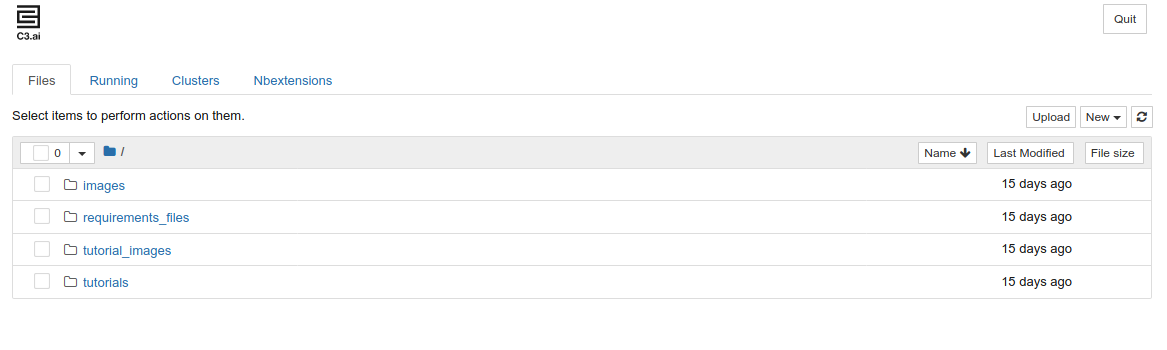
- Open an existing tutorial notebook: Navigate to the 'tutorials' directory in which many C3 AI Data Science-centric tutorials are available.
- Upload an existing notebook: Press the 'Upload' button and select either a notebook of your own or one mentioned on the DTI training pages. (Be aware that the `c3` object will already be available in this case so you will have to comment out cells which establish this object.)
Creating new notebooks and review a tutorial
This notebook comes already connected to the package currently provisioned on your tenant/tag and so, for example, if you have the Covid-19 Data Lake provisioned you'll be able to do the following with no preparation:
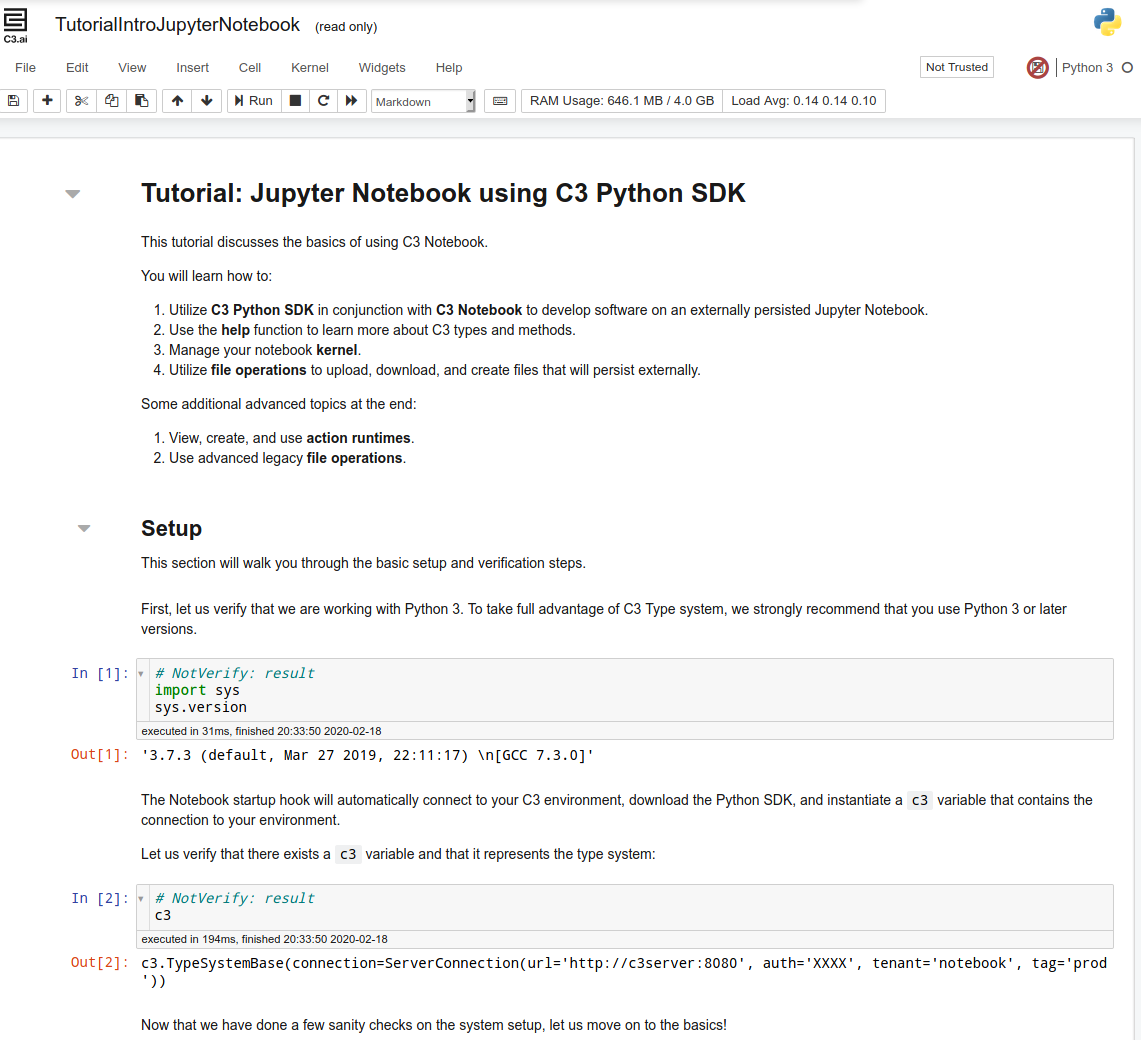
Simply navigate to the `tutorials` directory and select the tutorial you want to use. These tutorial notebooks should work out of the box. The C3.ai DTI highly recommends going through the `TutorialIntroJupyterNotebook.ipynb` notebook. This notebook provides a great foundation for working with C3 AI Suite through Jupyter.
Upload a new notebook
Finally, you can upload a new notebook from your local device by using the 'Upload' button.
1 Comment
Yifang Zhang
>> var env = CondaActionRuntime.requirementsFilesForLanguage("Python") >> undefined
>> env['py-tensorflow_1_0_0']
>> '#conda env create --file requirements.yaml\nname: py-tensorflow_1_0_0\nchannels:\n- https://repo.continuum.io/pkgs/main\ndependencies:\n- dill=0.2.8.2\n- tensorflow=1.9.0\n- numpy=1.15.2\n- pandas=0.22.0\n- python-dateutil\n- python=3.6'