| HTML |
|---|
<div style="background-color: yellow; border: 2px solid red; margin: 4px; padding: 2px; font-weight: bold; text-align: center;">
The Delta documentation has moved to <a href="https://docs.ncsa.illinois.edu/systems/delta/">https://docs.ncsa.illinois.edu/systems/delta/</a>. Please update any bookmarks you may have.
<br>
Click in the link above if you are not automatically redirected in 5 seconds.
</br>
</div>
<meta http-equiv="refresh" content="5; URL='https://docs.ncsa.illinois.edu/systems/delta/'" /> |
| Table of Contents |
|---|
Customizing Jupyterlab with Anaconda environments
Step one is to load an anaconda_<cpu, gpu, mi100> that you want to use as your base installation and initialize your default login shell to use conda environments.
Select an anaconda3:
| Code Block | ||
|---|---|---|
| ||
[arnoldg@dt-login03 scripts]$ module load anaconda3_cpu
[arnoldg@dt-login03 scripts]$ conda init bash
...
[arnoldg@dt-login03 scripts]$ bash
(base) |
After you have run "conda init bash" you will not need to load anaconda3_cpu (or gpu ) modules again. Just use your new custom environment.
| Info | ||
|---|---|---|
| ||
You may see error messages from conda init bash above. Just control-c through them and continue. As long as conda added code to the end of your .bashrc (or similar for other shells), things will work properly. |
Start a new shell with bash or a new terminal or login session with Delta. You'll now see this prompt showing that you are within the conda environment you initially chose. If you want to change environments later (say to anaconda3_mi100) you can edit your .bashrc and do another "conda init bash" with that new module loaded.
To create a new custom environment, you have 2 options.
Create a new empty environment:
| Info | ||
|---|---|---|
| ||
If you will be making custom environments for more than one partition type (cpu, gpu, mi100), it may be helpful to include that metadata in the name of your environment. |
Install jupyter into the environment in order to use it with OpenOnDemand. This option adds about 150 python modules to your environment and requires about 1.3 GB in your $HOME. Setup time: about 10 minutes.
| Code Block | ||
|---|---|---|
| ||
(base) conda create --name mynewenv

Collecting package metadata (current_repodata.json): done
Solving environment: done

## Package Plan ##

  environment location: /u/arnoldg/.conda/envs/mynewenv

Proceed ([y]/n)? y

Preparing transaction: done
Verifying transaction: done
Executing transaction: done
#
# To activate this environment, use
#
#     $ conda activate mynewenv
#
# To deactivate an active environment, use
#
#     $ conda deactivate

Retrieving notices: ...working... done
(base) conda activate mynewenv
(mynewenv) conda install jupyter
Collecting package metadata (current_repodata.json): done
Solving environment: done

## Package Plan ##

  environment location: /u/arnoldg/.conda/envs/mynewenv

  added / updated specs:
    - jupyter


The following NEW packages will be INSTALLED:

  _libgcc_mutex      pkgs/main/linux-64::_libgcc_mutex-0.1-main None
  _openmp_mutex      pkgs/main/linux-64::_openmp_mutex-5.1-1_gnu None
  anyio              pkgs/main/linux-64::anyio-3.5.0-py310h06a4308_0 None
  argon2-cffi        pkgs/main/noarch::argon2-cffi-21.3.0-pyhd3eb1b0_0 None
...
(mynewenv) conda list | grep jupyter
jupyter                   1.0.0           py310h06a4308_8
jupyter_client            7.3.5           py310h06a4308_0
jupyter_console           6.4.3              pyhd3eb1b0_0
jupyter_core              4.11.1          py310h06a4308_0
jupyter_server            1.18.1          py310h06a4308_0
jupyterlab                3.4.4           py310h06a4308_0
jupyterlab_pygments       0.1.2                      py_0
jupyterlab_server         2.15.2          py310h06a4308_0
jupyterlab_widgets        1.0.0              pyhd3eb1b0_1
(mynewenv) conda list | wc -l
152
(mynewenv) du -sh $HOME/.conda/envs/mynewenv
1.3G    /u/arnoldg/.conda/envs/mynewenv
|
...or create a new clone of your chosen anaconda3_<cpu, gpu, mi100> module:
Jupyter (and everything else from your loaded anaconda3_ module will be copied into this environment). This option adds about 500 python modules to your environment and requires about 6.3 GB in your $HOME. Install time can be up to 1/2 hr.
| Code Block | ||
|---|---|---|
| ||
(base) time conda create --name myclone --clone base
Source:      /sw/external/python/anaconda3_cpu
Destination: /u/arnoldg/.conda/envs/myclone
The following packages cannot be cloned out of the root environment:
 - defaults/linux-64::conda-env-2.6.0-1
 - defaults/linux-64::conda-22.9.0-py39h06a4308_0
 - defaults/linux-64::conda-build-3.21.8-py39h06a4308_2
 - defaults/noarch::conda-token-0.4.0-pyhd3eb1b0_0
 - defaults/linux-64::_anaconda_depends-2022.05-py39_0
 - defaults/linux-64::anaconda-navigator-2.1.4-py39h06a4308_0
 - defaults/linux-64::anaconda-custom-py39_1
Packages: 447
Files: 24174
Preparing transaction: done
Verifying transaction: done
Executing transaction: \
...

Retrieving notices: ...working... done

real    24m10.605s
user    0m54.353s
sys     1m56.843s
(base) conda activate myclone
(myclone) conda list | wc -l
501
(myclone) du -sh $HOME/.conda/envs/myclone
6.3G /u/arnoldg/.conda/envs/myclone |
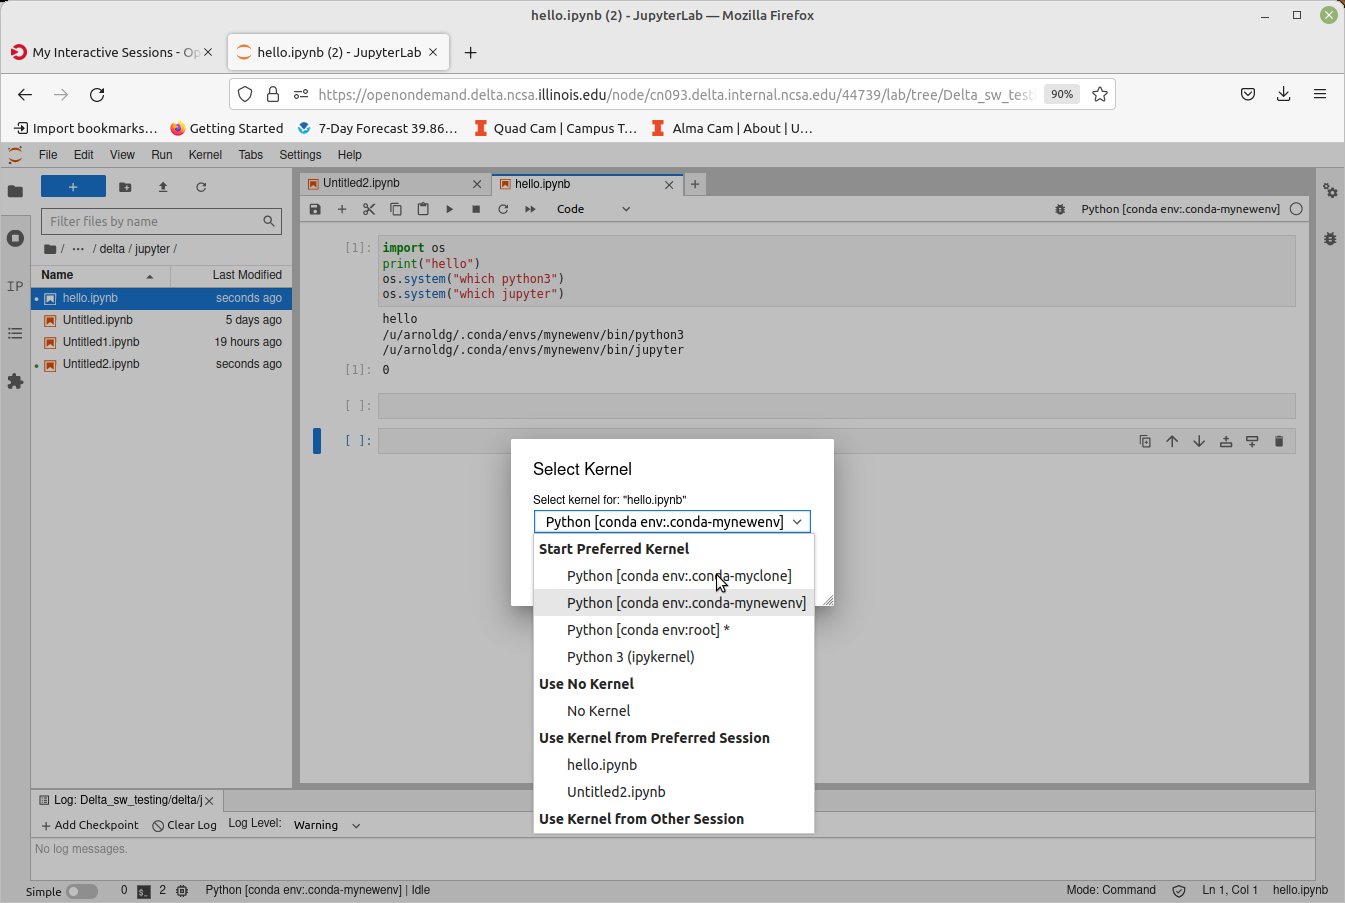
Start an OpenOnDemand Jupyterlab session and access one of your environments (remember to match your partition and account types for gpu, cpu), then select the matching kernel for your Jupyter work:
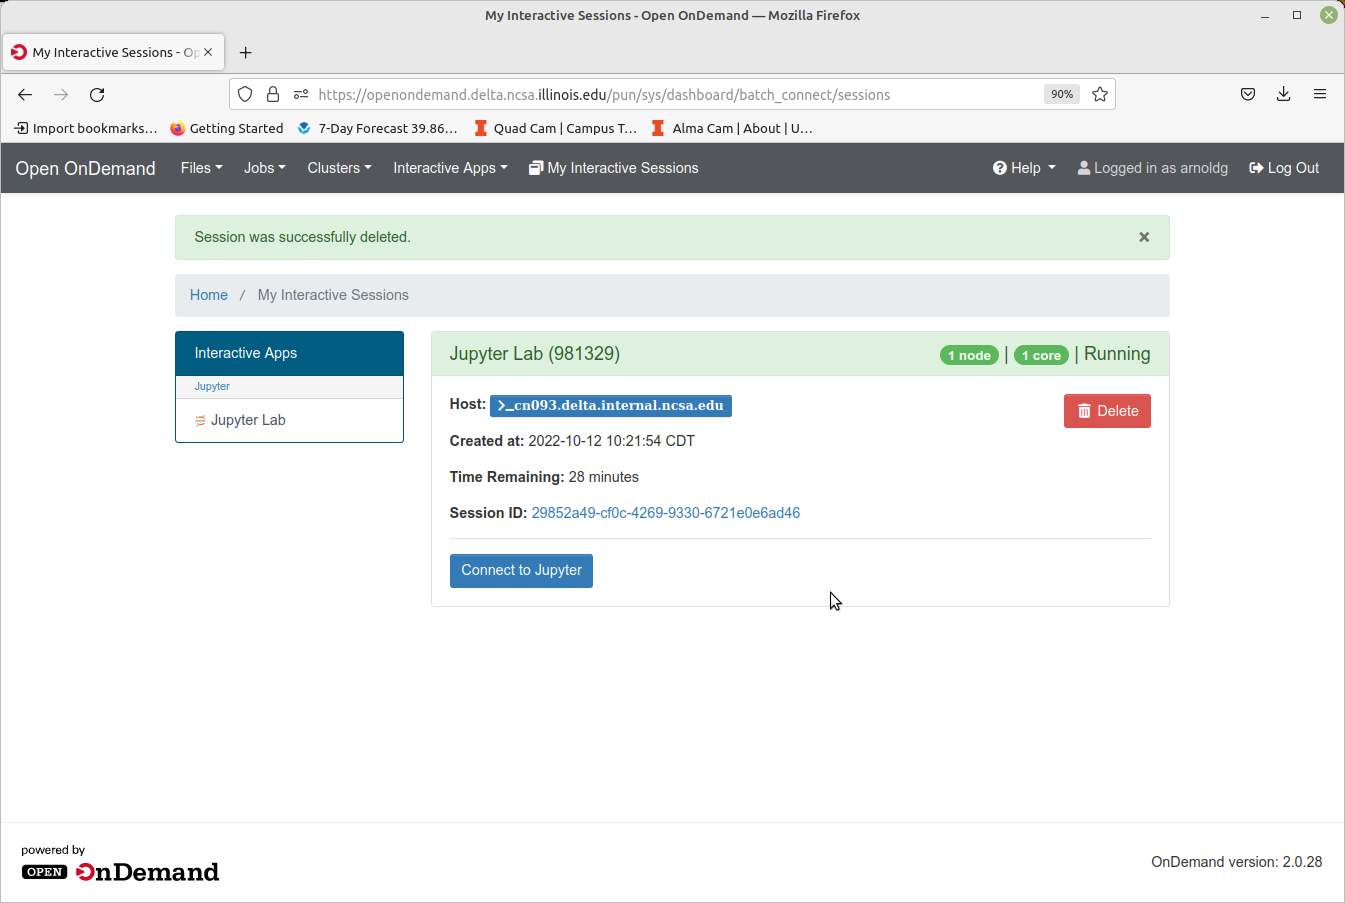
Launch Jupyterlab
After filling in the OpenOnDemand form and submitting your job, it will start in a few minutes showing the "Connect to Jupyter" button when ready.
Hover over items in the Launcher view to see which environment will be used, selecting the one you want for this session.
Change your kernel to match if you are opening a notebook from a different environment.
R
R is available in Jupyterlab by activating the environment via the module anaconda_Rcpu. Append the module load line to your .bashrc. R will run on the cpu cores (not gpu enabled).
| Code Block | ||
|---|---|---|
| ||
$ tail .bashrc

module load anaconda3_Rcpu
$ |
After modifying your .bashrc and getting a new shell, your login prompt should reflect that you are within the anaconda3_Rcpu environment, R will be in your $PATH, and starting Jupyterlab from the OpenOnDemand interface will automatically offer you the R options with the Launcher.
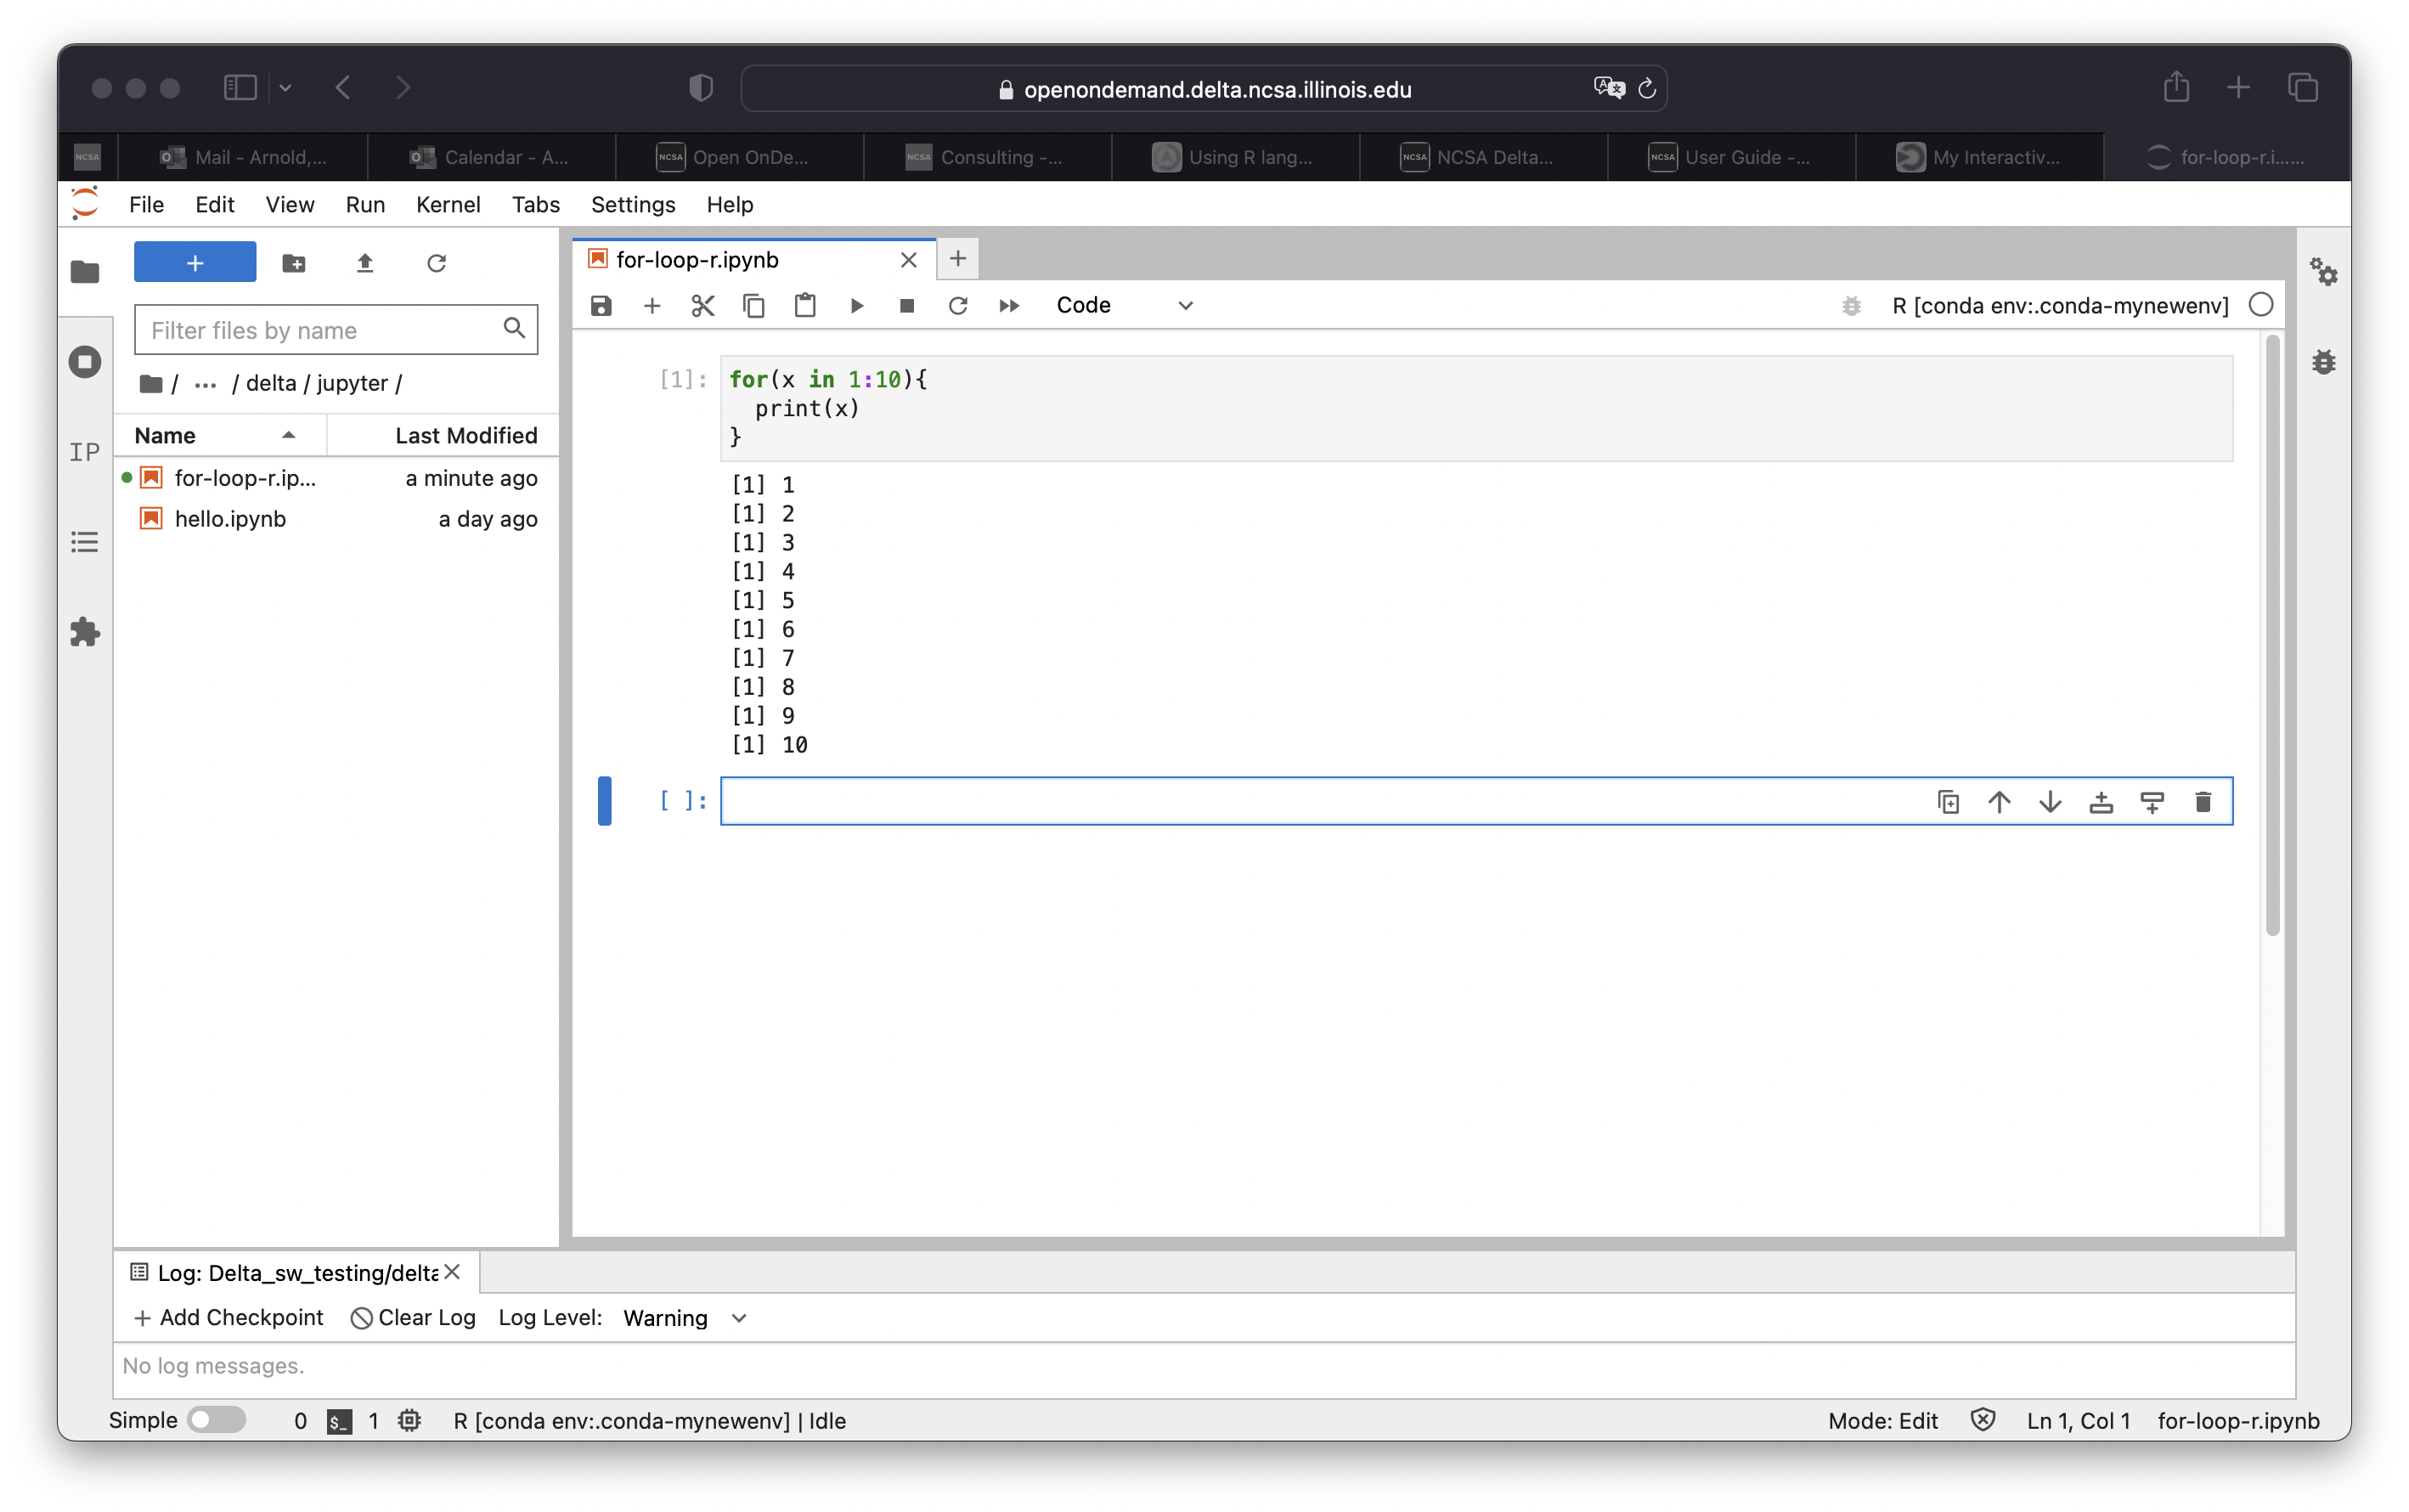
Proceed to use R:
Debugging OpenOnDemand problems:
For internal staff debugging (also For internal staff and debugging, also possibly useful for new OOD users: debugging jupyterlab , OpenOnDemand)


