...
Next, the choice of "Flavor" is an important one relating to the planned use of the instance/server. These are virtual hardware templates that define the resources that a new instance will be created with. They specify sizes for RAM, disk, number of cores, and so on. The public flavors which are available to all projects on Nebula are listed here. Each project can define its own flavors in addition to these and they will all be displayed in the drop down list together. Selecting a flavor from the drop down list will show you its attributes. You should choose a flavor that has sufficient disk space to install your OS and software stack. You should not choose a flavor with a larger disk in order to have space to store your data. A Volume should be added to your instance later to provide a place for your data.
For Instance Count, selecting ``1`` is appropriate for the base case of starting up a single server, but you can select a higher count if you are ready to start up a working cluster on Nebula.
For Instance Boot Source the selection ``Boot ``Boot From Image`` Image`` is a standard approach for initial OpenStack work, and will present an Image Name choice box that includes standard cloud base images for CentOS 6, CentOS 7, Ubuntu 14.04, Ubuntu 15.04, Cirros 0.3.4, as well options for Fedora, Debian, CoreOS, etc. As with flavors, each project can have its own images in addition to the publicly available ones.
For this Intro we'll proceed with CentOS 7 selected.
...
Second, selecting the proper Security Groups is important to prevent problems/blockers down the line. These security groups set what traffic the nova router, which is internal to OpenStack, allows to flow to and from your instance. They do not configure the iptables internal to your instance. To enable ssh access into the instance after startup, select the ``remote SSH`` security group. If the instance may run web servers/services, select ``remote http`` to ensure that the standard ports will be open. As with flavors, other security groups can be defined by your project and will be available to you.
Networking
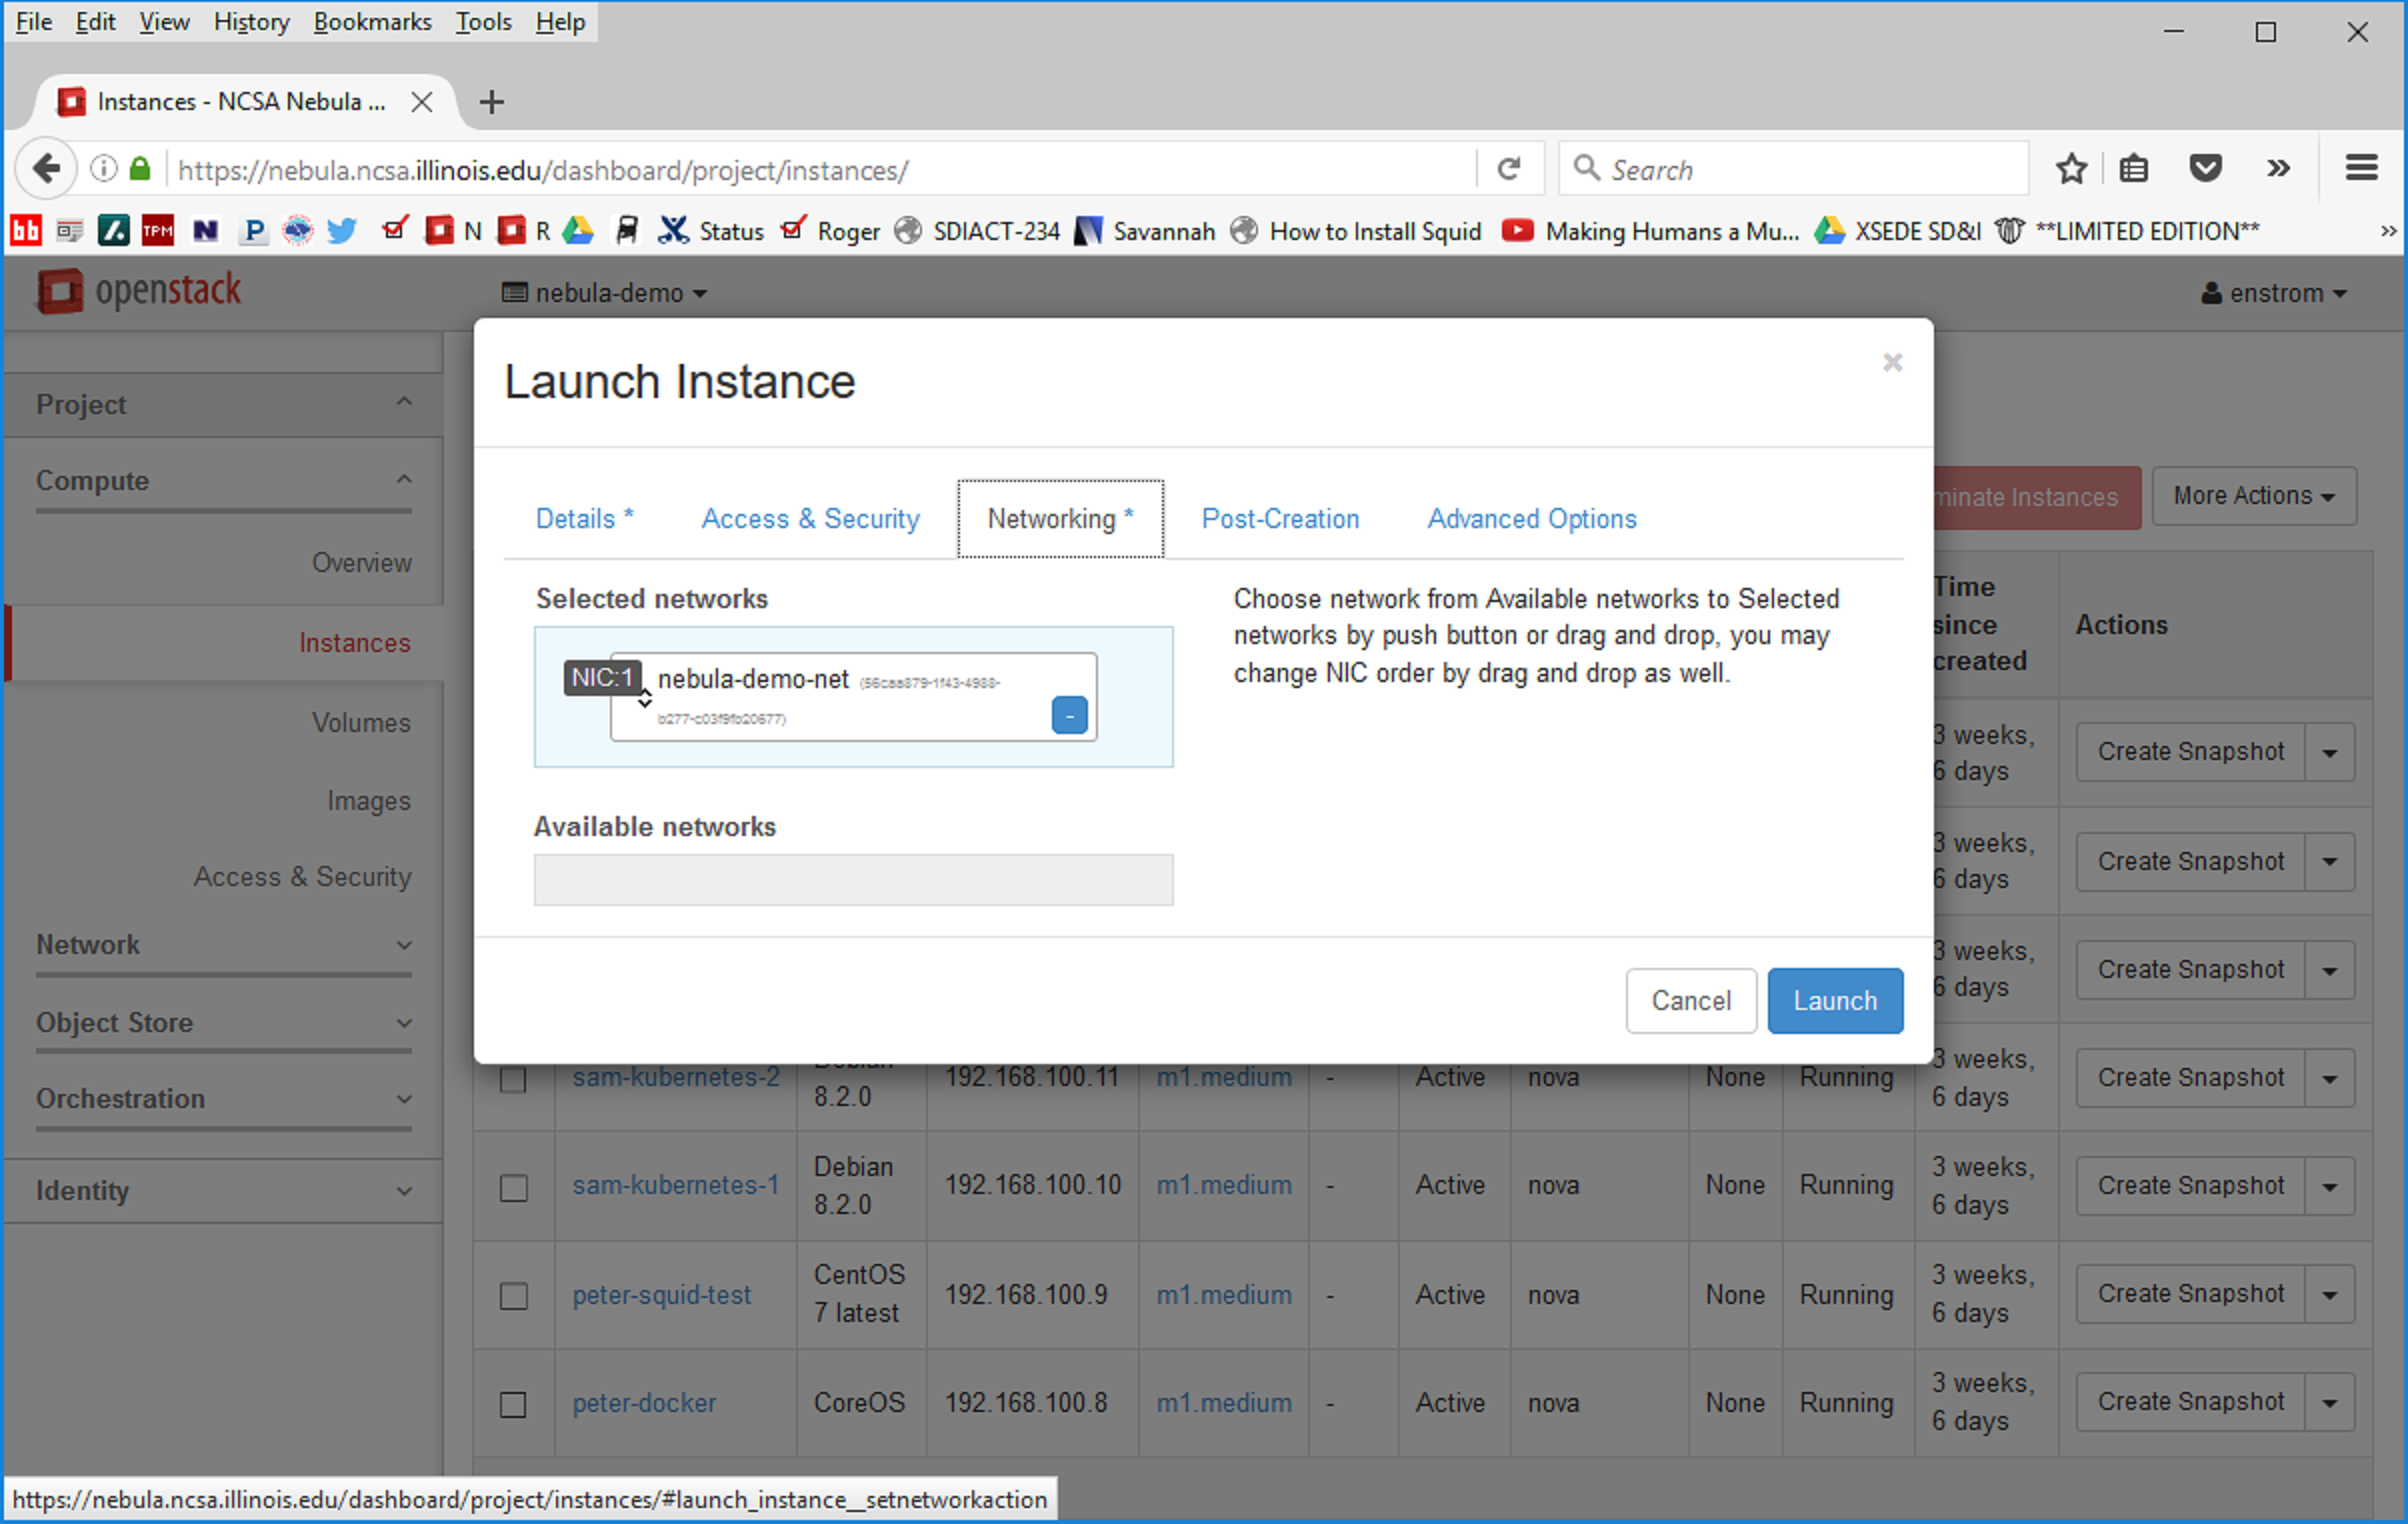 ----------
IMAGE
The third Panel involves networking.
If your project only has access to one network it will already be selected for you. If other networks are available for your project they can be selected or dragged into the "Selected networks" box.
It is possible to create user-defined networks and attach instances to such networks, though this case would be for specific applications and is beyond our current scope.
The last two panels, **Post-creation** and **Advanced Options**, provide the ability to customize the instance after the initial startup in a scripted manner (**Post-creation**) and to manually partition the disk of the instance (**Advanced Options**).
We skip these for our current test caseexample, and proceed to press the blue **Launch** button at the lower right to initiate the startup process.
Launch
------
IMAGE
After pressing **Launch** we should observe the new instance to be "Spawning". "
For most instances the startup should fairly quick (less than a minute), though the startup could take longer if the base image or snapshot that is being used is large (several GB for example).
IMAGE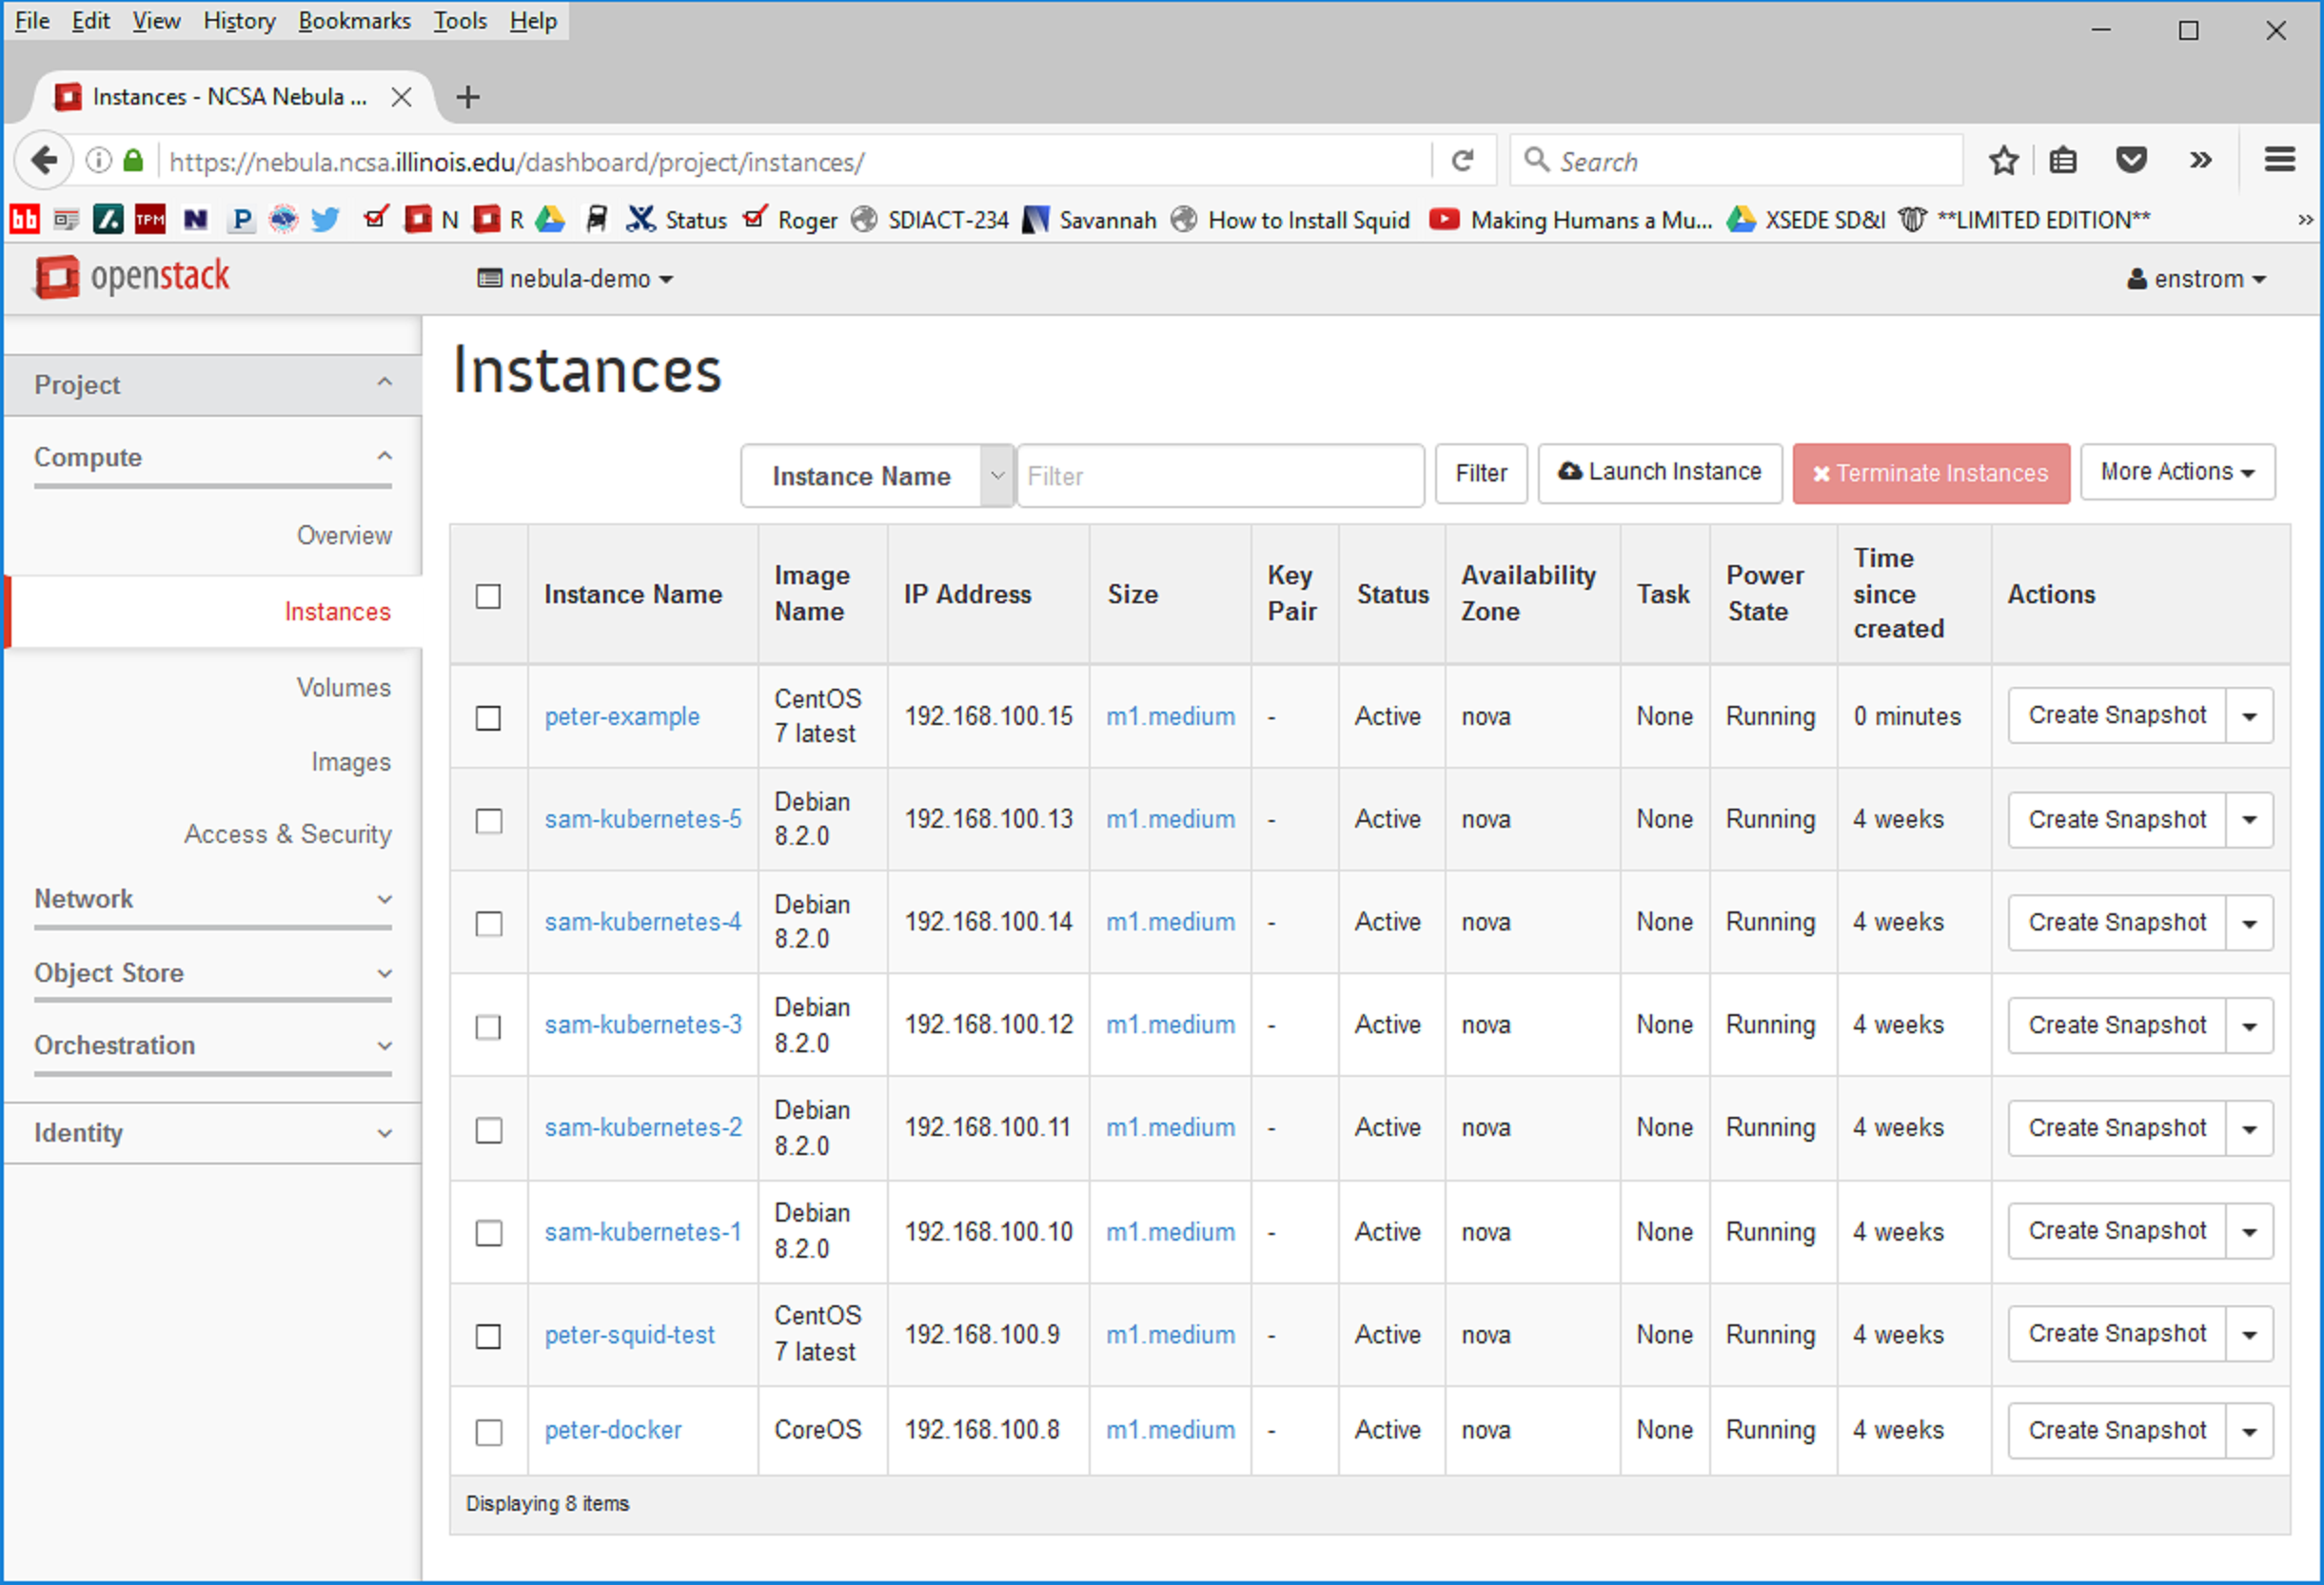
After a short time we observe the newly created instance to be in the "Running" state.
We can view the parameters that characterize the instance as per our specifications:, the instance name, the base image, the flavor/size, the keys configured for access, etc. .
Under **IP address** we find the IP on the internal network that was used in starting the instance.
While this locates the instance on the internal network, it is not usable for access from the outside.
Associating a floating IP
...
To enable external access we proceed to **Associate Floating IP** by selecting this option on the **Actions** menu on the very right of the Instance list (each instance has such a menu):
IMAGE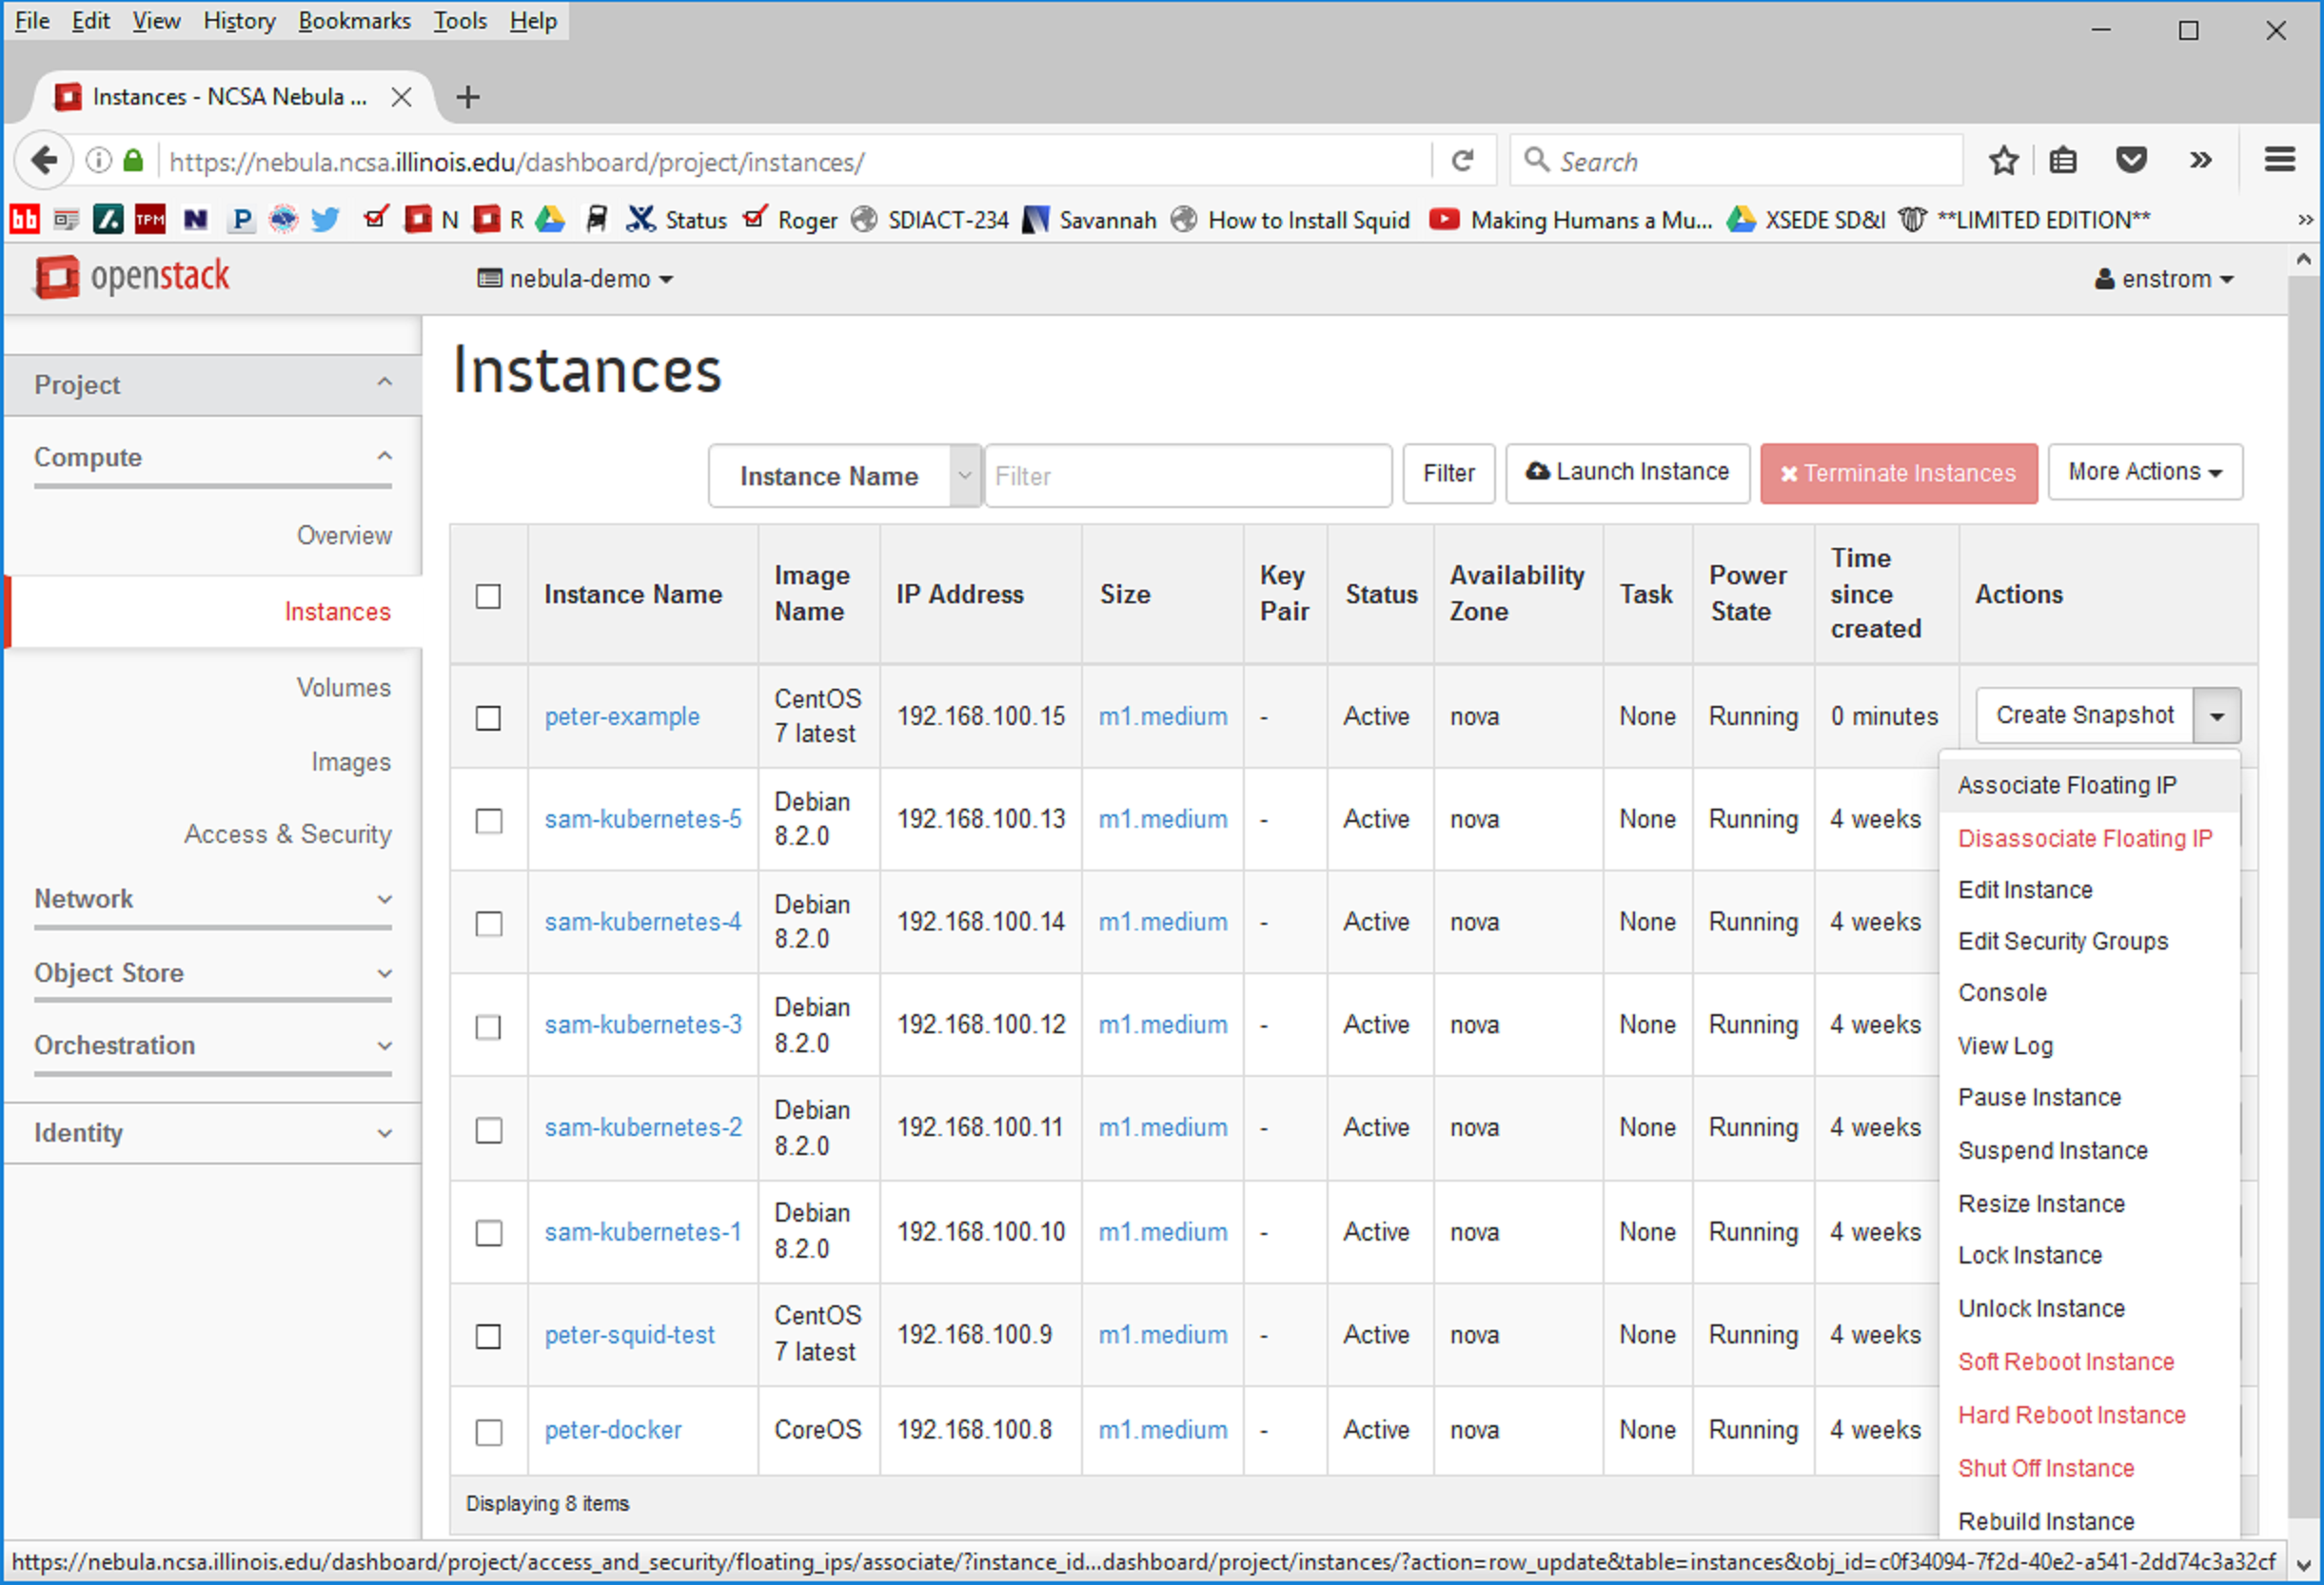
IMAGE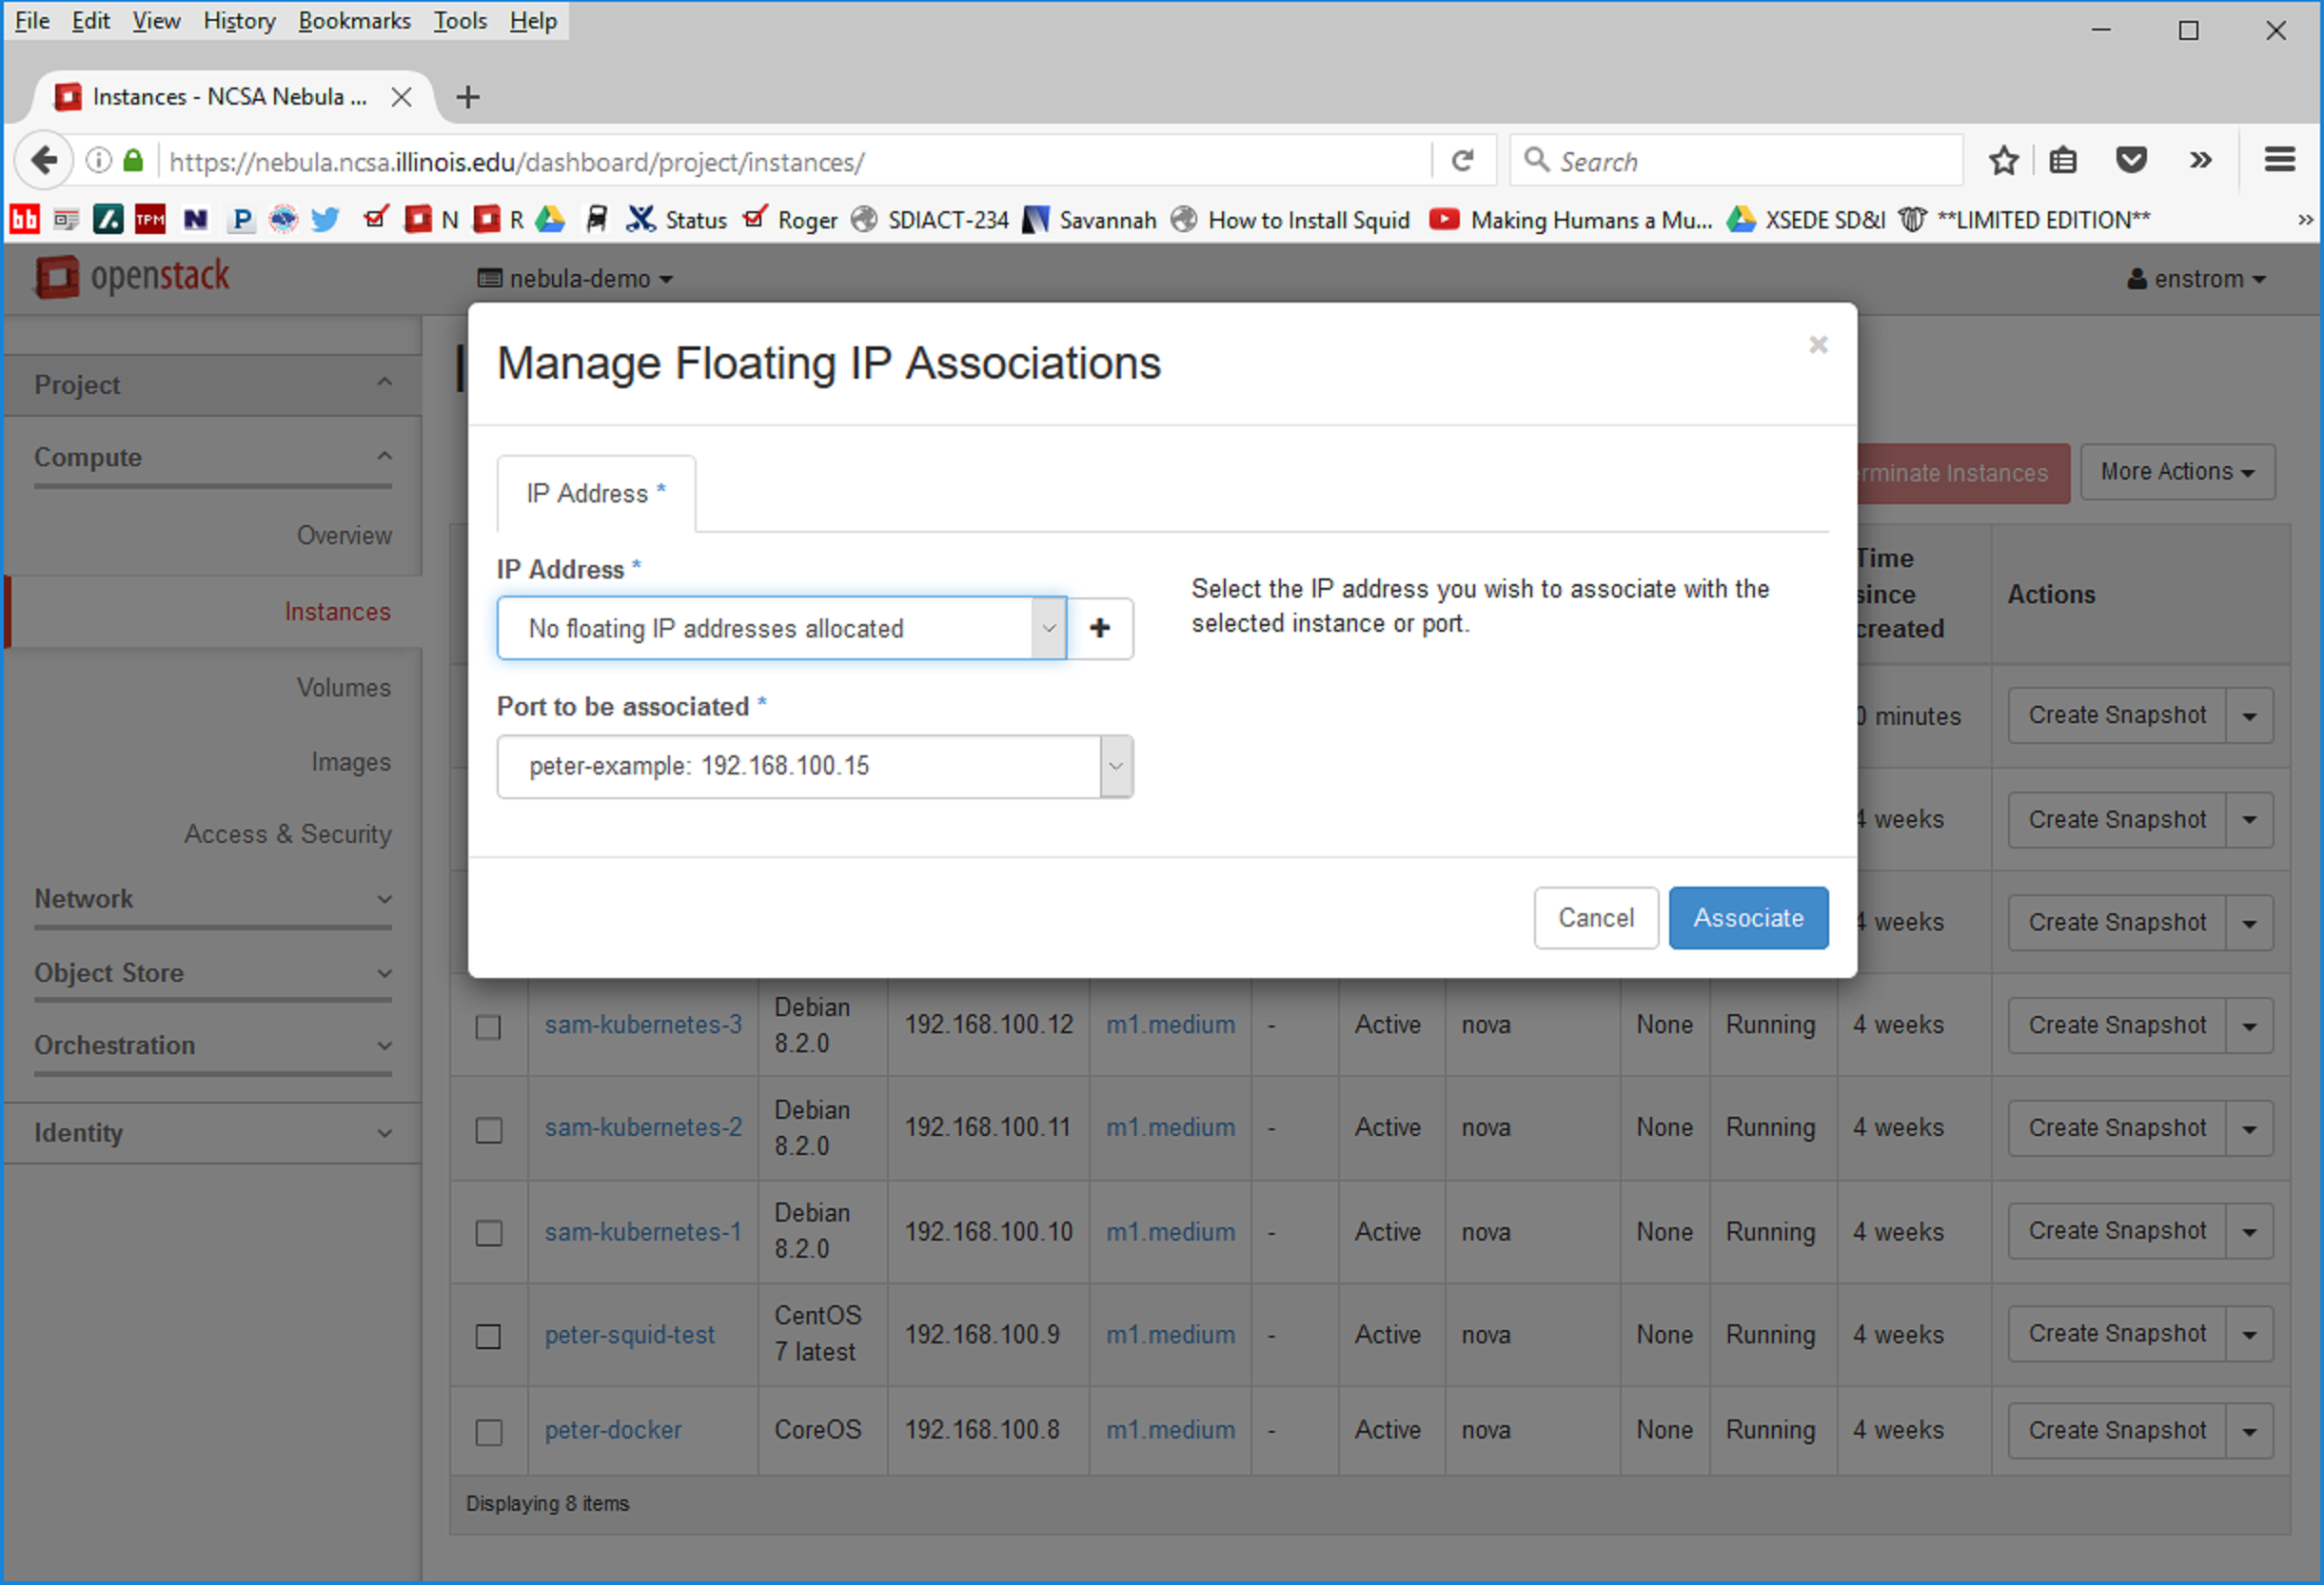
With the **Manage Floating IP Associations** window open, we can now select a public IP address to use (for NCSA Nebula, these will be in the range ``141.142.208.xxx``).
If the list of available of public IP addresses happens to be empty, one can generate an IP for use by clicking on the "+" sign to the right of the selection box.
After pressing "Associate" (and a possibly refreshing the Instance List) , we should observe the Floating IP for the instance, in this example 141.142.211.223.
IMAGE
We should now be able to work in a Unix shell and log in to the new instance, issuing in this example the command
.. code-block:: bash
ssh -i <keyfile> centos@141.142.208211.193223
 IMAGE
IMAGE
Because the base image used in this exercise was a CentOS 7 image, we log in making use of a user ``centos`` that by default exists on the base image.
For other base images/OS's, this user is different though sensibly named: on Ubuntu the user is ``ubuntu``, on cirros the user is ``cirros``, on CoreOS the user is ``core``.
One should also observe the ability to become superuser on the system, i.e., after issuing
.. code-block:: bash
sudo su -
the ``centos`` user should become ``root`` in a passwordless manner.
As ``root`` one can now configure the instance as wanted.
...