NCSA wiki will be offline Friday, Apr 19, 2024, from 1700 hours until Sun, Apr 21, 2024 in order to upgrade Confluence.
...
- Look at our DTI Readiness Checklist to check that all accounts you need are in order.
- Request a tag through help@c3dti.ai or check your emails for a tag the DTI has already sent you.
- Find your
<vanity_url>which is a url you will use to access your tag's facilities.
- Find your
- Provision the jupyterBase package
- If your tag was prepared for you by the DTI, this package should already be installed, and you can skip this step. If you're not sure, or would like to try the provisoining process, continue here:
- Access your tag’s static console:
<vanity_url>/static/console
- Select the web provisioner
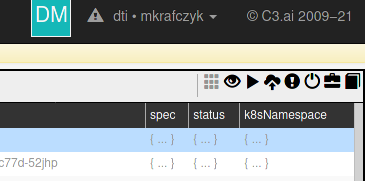
- Select the Cloud icon (4th from the left)
- Select the Cloud icon (4th from the left)
- Download the jupyterBase package
- Unzip the jupyterBase package to your local machine
- On the provisioner web page, change the Package name to ‘jupyterBase’
- Under the ‘Repository Folder’ field, select the Browse files button
- Select the 'dtiTraining' folder unpacked from jupyterBase
- Click the ‘Deploy’ button
- Wait for the deployment to finish (It can take a while, if your browser asks, wait for the tab)
- Refresh the static console page
- Launch the Jupyter Service
- Access your tag’s static console:
<vanity_url>/static/console
- Open your browser’s devtools and go to the Javascript console
- On many browsers this is the ‘Ctrl+Shift+I’ keyboard shortcut; here is an article with directions on how to do this for different browsers on Windows and MacOS.
- Check whether a jupyter Jupyter is already running
- Execute the following command in the browser javascript console
Jupyter.isRunning()- Returns ‘true’ if running, ‘false’ if not
- Launch the Jupyter service
Jupyter.start()- Wait until you get a network timeout, or the call returns in the browser console. You should get an ‘undefined’ as the function doesn’t return any output
- Navigate to the jupyter Jupyter service
<vanity_url>/jupyter
- Install the python environment
- Open a new jupyter Jupyter notebook (we need to get to the Kernel management menu)
- Select the "Kernel" menu
- Select "Manage Kernels"
- Browse the list and select ‘install’ on the 'py-dataanalysis' kernel. (this is the special kernel signed for this course)
- Wait until either there’s a timeout, or the spin icon stops and it says ‘uninstall’
- Refresh the jupyter Jupyter notebook
- Select the 'Kernel' menu
- Select 'Change Kernel'
- Select the 'py-dataanalysis' kernel.
- Test your code
- Go back to the jupyer tree page
- Upload your notebooks, or open a new notebook
- Make sure to select the 'py-dataanalysis' kernel.
- Try some code
- Shutdown your Jupyter Service
- Remember when you're finished to shutdown your jupyter Jupyter resources as leftover running services can impact performance for other users.
- You can click the 'Shutdown Service' button on your jupyter Jupyter tree page
<vanity_url>/tree - You can also execute the command
Jupyter.stop()from your static console page.
